Creating a Campaign
Last updated: September 23, 2026
There are several settings you can use to build your campaign effectively. Start by identifying your target audience and shaping an outreach strategy that truly gets you noticed.
Creating a Campaign
When you begin creating a campaign, you’ll first see the main setup screen.
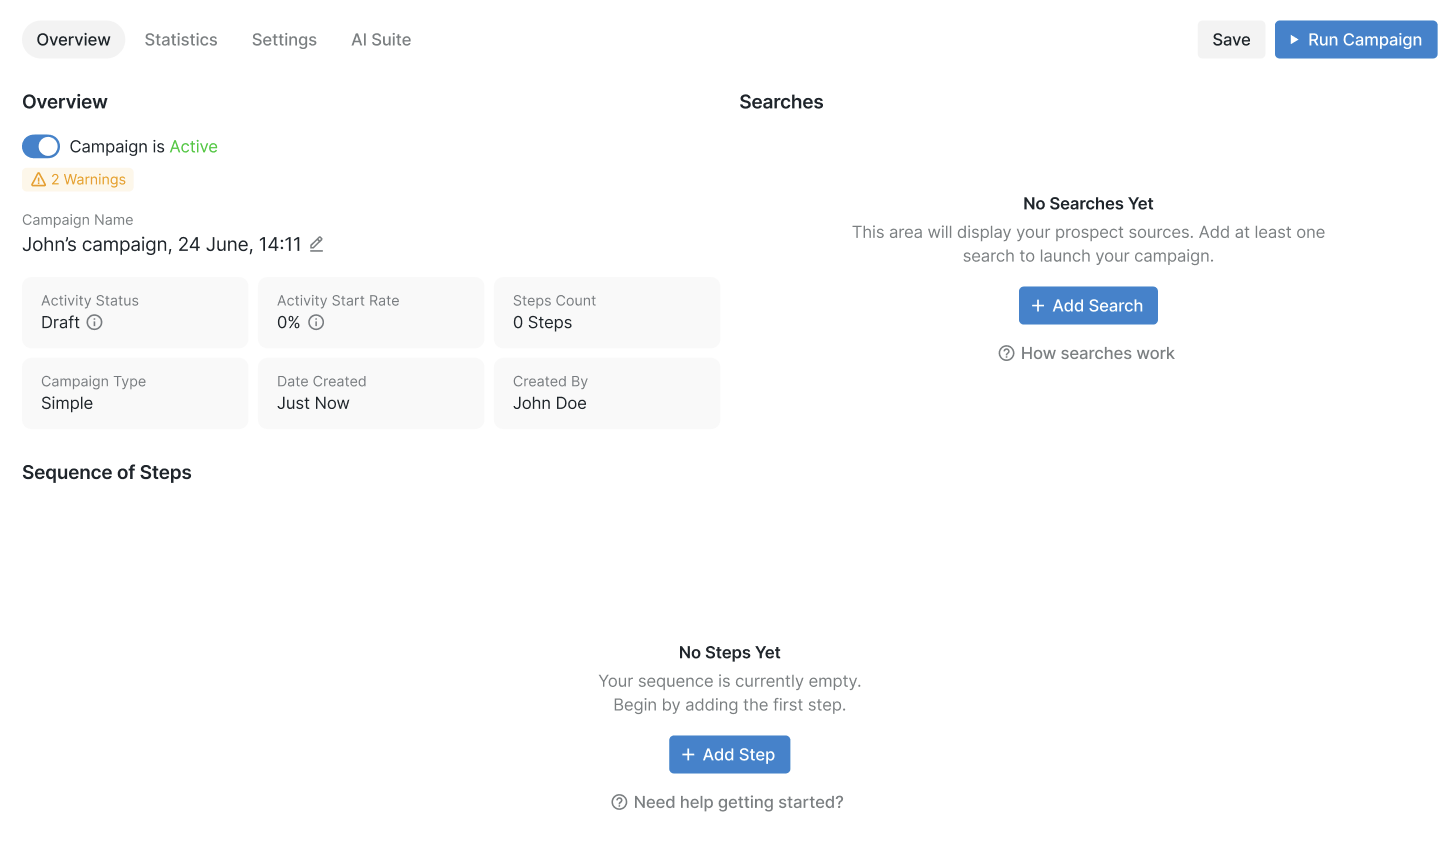
In the Overview section, you can find key campaign details such as its activity status, completion rate, number of steps, campaign type. The campaign type determines which outreach channels are used - multichannel campaigns can use both email and social channels (like LinkedIn connection requests), while Email Only campaigns restrict outreach to email only. creation date, and creator. From here, you can also rename your campaign, select a search type, and configure its steps.
Important: If you move messages or change the campaign sequence after prospects have been contacted, those contacted prospects will be automatically paused. You must manually activate them in bulk from the contacted folder to resume message delivery.
Note: If you change a campaign's type after adding prospects, the change only affects new profiles added afterward. Existing profiles retain their original channel settings (social profiles remain social, email profiles remain email).
Navigator list: a link to a saved Sales Navigator search list on Social (must be in
sales/lists/peopleformat, notaccounts/dashboardURLs);
When using Instant Search, all current Sales Navigator results are pulled into the campaign when it goes live. However, new profiles that appear in Sales Navigator after the search is marked complete are not automatically added to the campaign. To capture newly appearing profiles, you'll need to manually rerun the search for that campaign—it will reprocess from page one, add any new matches, and skip duplicates.
Important: After adding a search URL, particularly for Sales Navigator lists, you must enable the search toggle to allow the system to start retrieving prospects. The toggle appears next to your added search. Make sure to click Save after enabling it to apply the changes. The time it takes to populate prospects depends on your Pages Search limits configured in Settings > Account Limits.
When configuring connection request steps, be aware that enabling Wait for the CR to be accepted will hold prospects at that step until their connection requests are accepted, which extends campaign execution time.
If manual approval is enabled for your workspace, each campaign step, such as sending connection requests or messages, will require manual approval before execution. You can approve pending tasks in Dashboard > My tasks. This setting affects campaign progression and may cause statistics to appear unchanged until tasks are approved.
Add prospects from existing campaigns feature in your campaign settings, prospects added from other campaigns may bypass certain steps, such as delayed connection requests, and proceed directly to subsequent Perform Action steps. To ensure prospects respect step delays, such as a 45-day delay on sending connection requests, disable this feature. When disabled, all prospects will pause for the configured delay before moving forward. The Recontact prospects setting controls whether messages are sent to these prospects—when disabled, the campaign will not send messages to prospects added from existing campaigns, even if other action steps are executed.
Reinviting prospects from old campaigns: If you need to reinvite prospects from previous campaigns where connection requests were sent and later withdrawn, you can move them to a new campaign with a connection request step. To ensure these prospects are processed correctly, enable both the Add Prospects from Existing Campaigns and Recontact Prospects settings in your new campaign. The system recognizes these contacts as previously contacted due to their interaction history, so both toggles must be active for the reinvitation to proceed.
Note: If you need to remove prospects from a campaign to add them to a different one, select the prospects and choose Remove from Campaign. This moves them to Outside of campaigns status; they are not deleted. Once removed, these prospects can be added to any new campaign, regardless of whether this setting is enabled or disabled.
When prospects are moved from another campaign to an active campaign, the system automatically pauses them by default. To have these prospects participate in the new campaign, go to the Prospects tab, filter by your campaign, select all prospects using the checkbox in the top left corner, and click Action → Resume campaign. The prospects will change their status to Active and begin participating in the campaign.
After pausing a campaign, you can view and manage paused prospects by going to the Inbox tab and selecting Show Only Paused Prospects under the Options filter. Note that there is currently no direct filter for “paused” campaign status in the campaign’s Prospects tab.
Note: Changes to campaign steps only affect prospects who haven't yet reached those steps. If you remove a step, such as a connection request with a message, after it has already been sent to a prospect, the message will still appear in your inbox once the prospect accepts the connection request. This is expected behavior—no new messages will be sent after removing the step, but already-sent requests will complete their cycle.