How to Create your Email Signature
Last updated: December 1, 2025
Save yourself the hassle of copying and pasting your email signature. By entering it once, you can access it instantly whenever needed.
From the homepage of your Buzz workspace, click Resources on the left menu bar.
From the top menu, click Signatures:
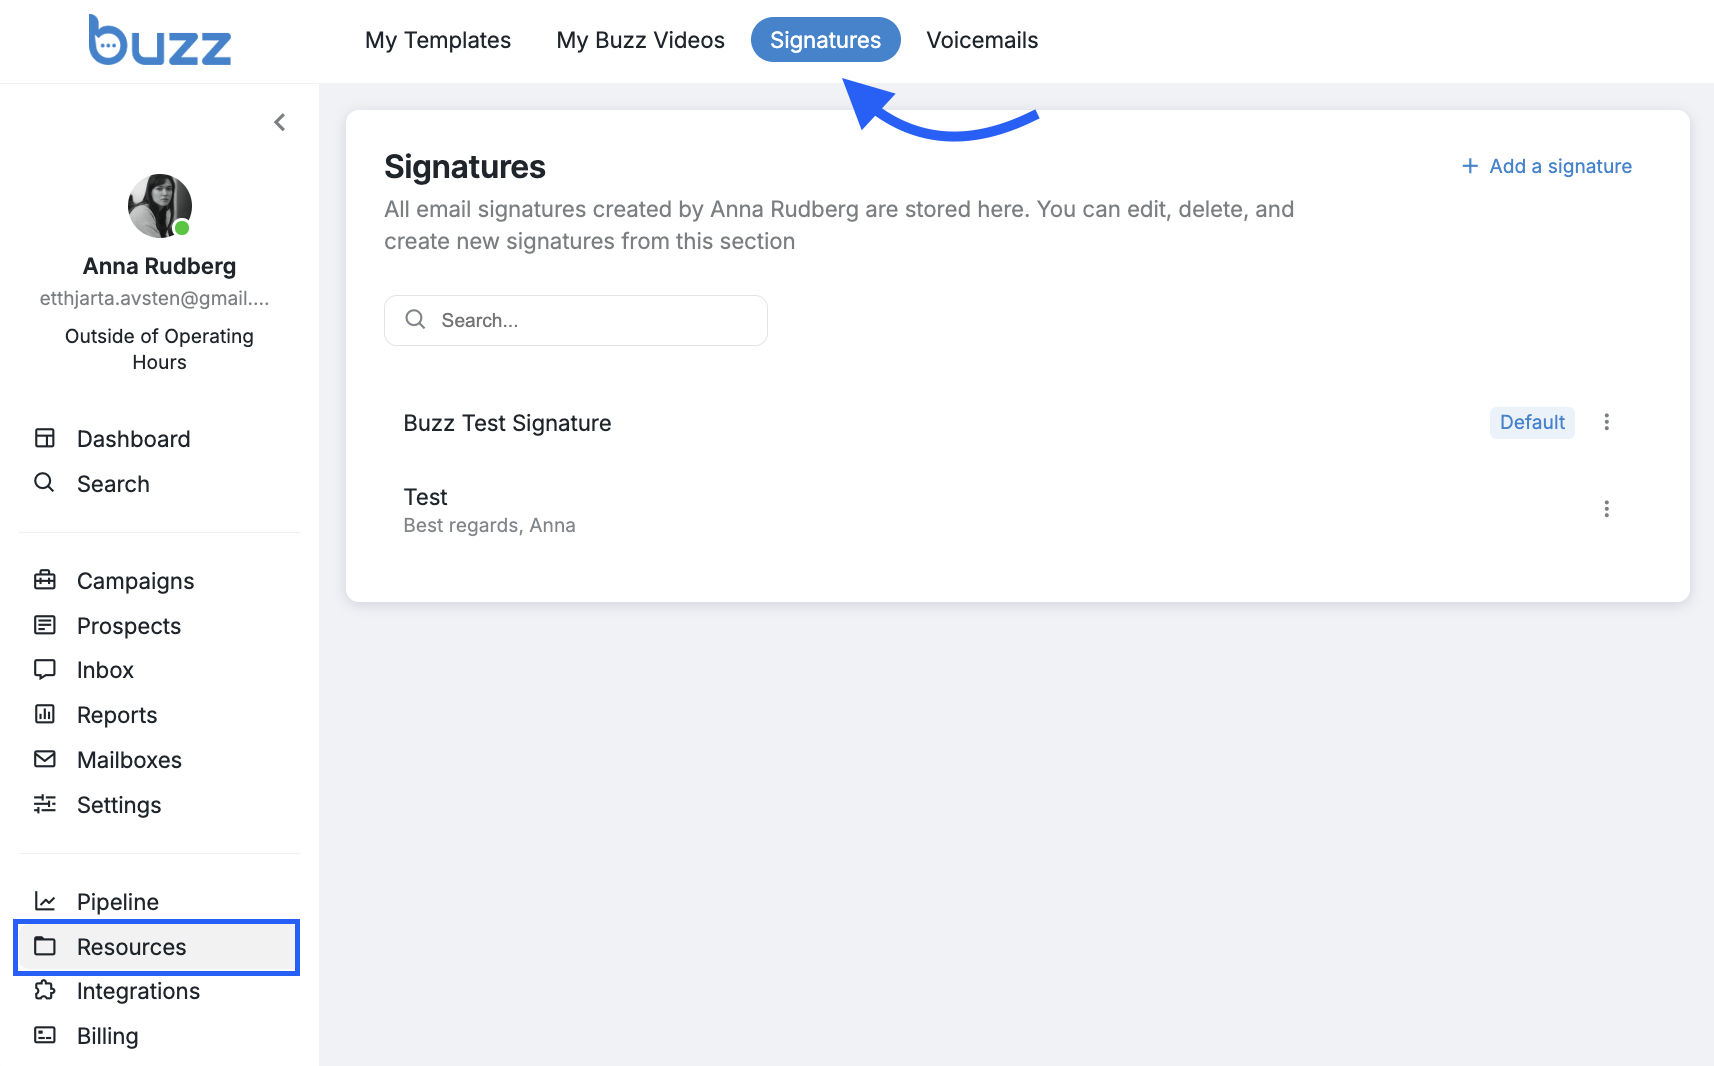
If this is your first time creating a signature, you will find an option to add a signature in the top-right corner:

4. Proceed by completing the title and signature fields:
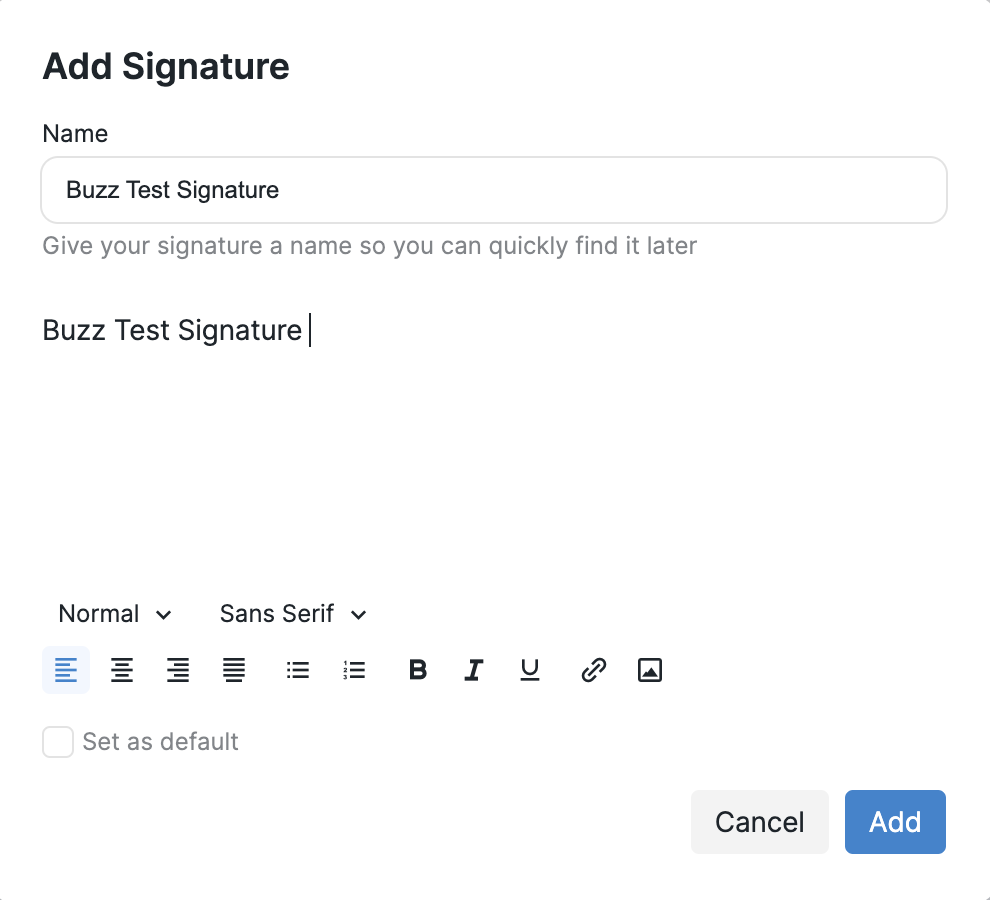
To prevent your email from being flagged as potentially harmful, it is advisable to restrict the use of links.
How to Add an Image to Your Signature
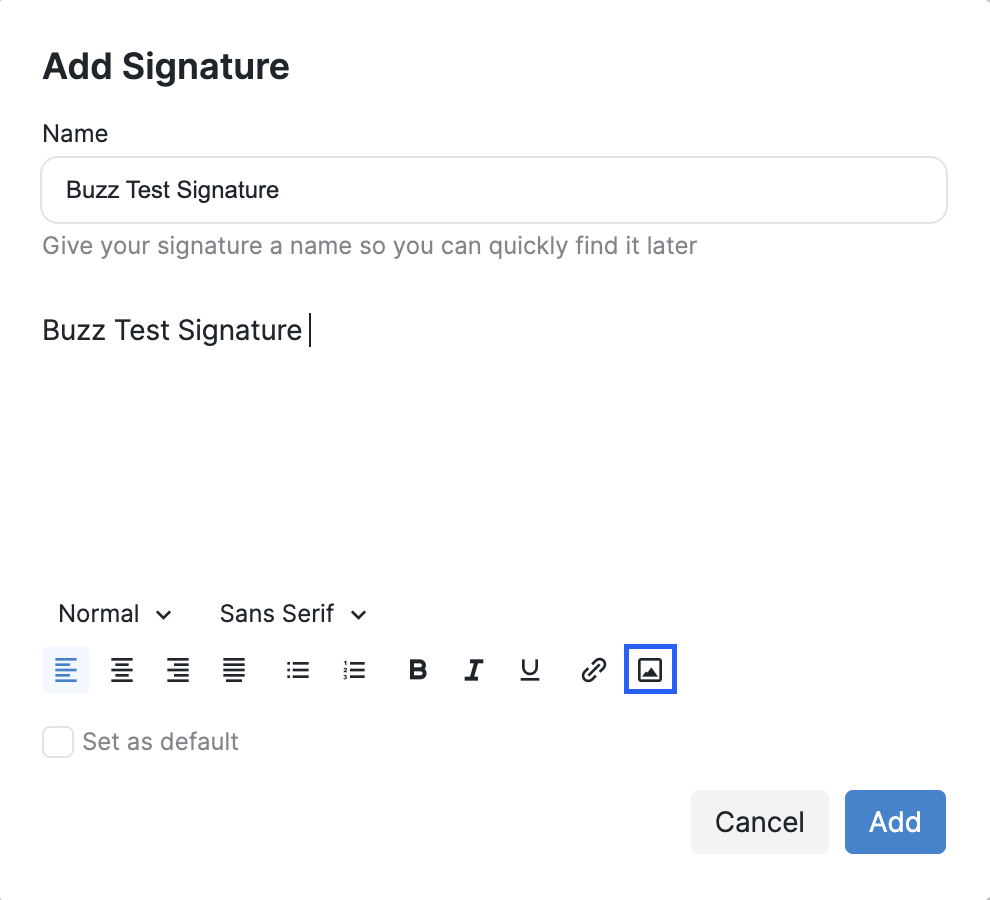
Enhance your signature by incorporating an image, such as your brand logo or any other graphic you wish to include. To do so, follow these steps:
Click on the small image icon at the bottom of the signature editor.
2. In the provided field, paste a direct link to the image you want to include in your signature.
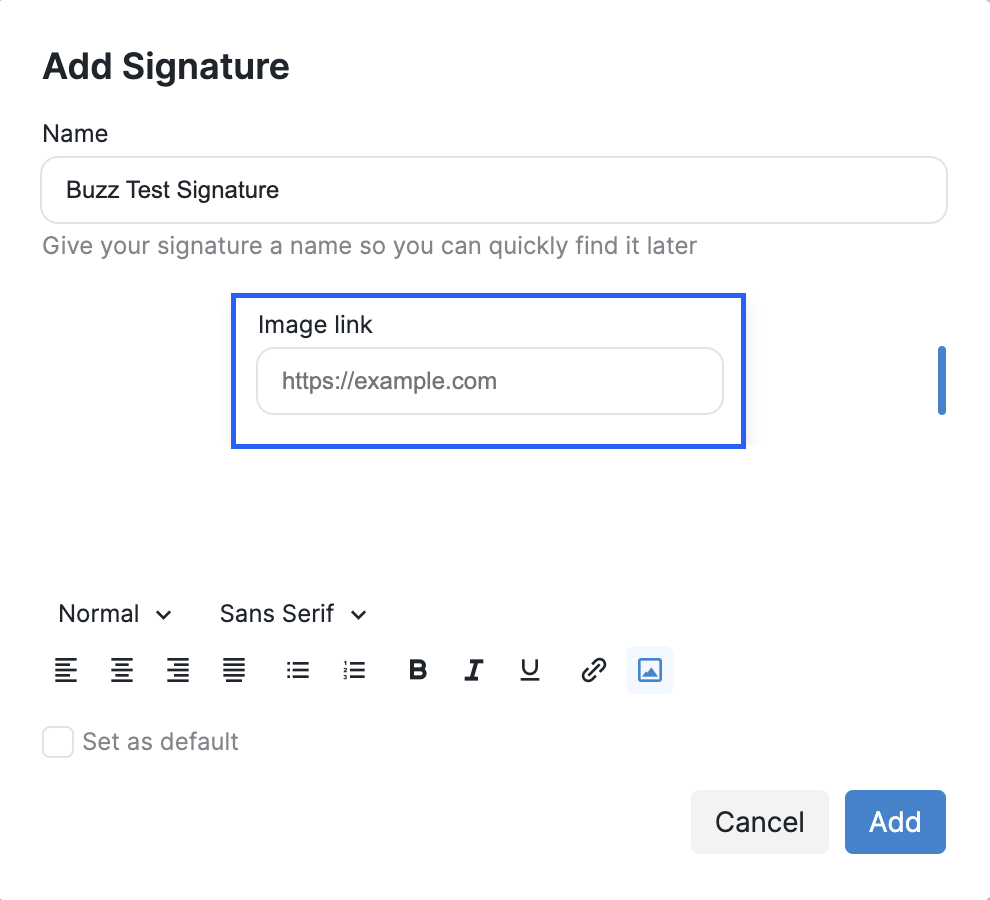
To embed an image, you must supply a direct link, which can be generated through free image hosting platforms like Imgur.com.
Tips on using free image hosting sites
To add a picture to the signature using a direct link, you need to:
Have the image downloaded on your device.
Visit a free image hosting site such as imgur.com.
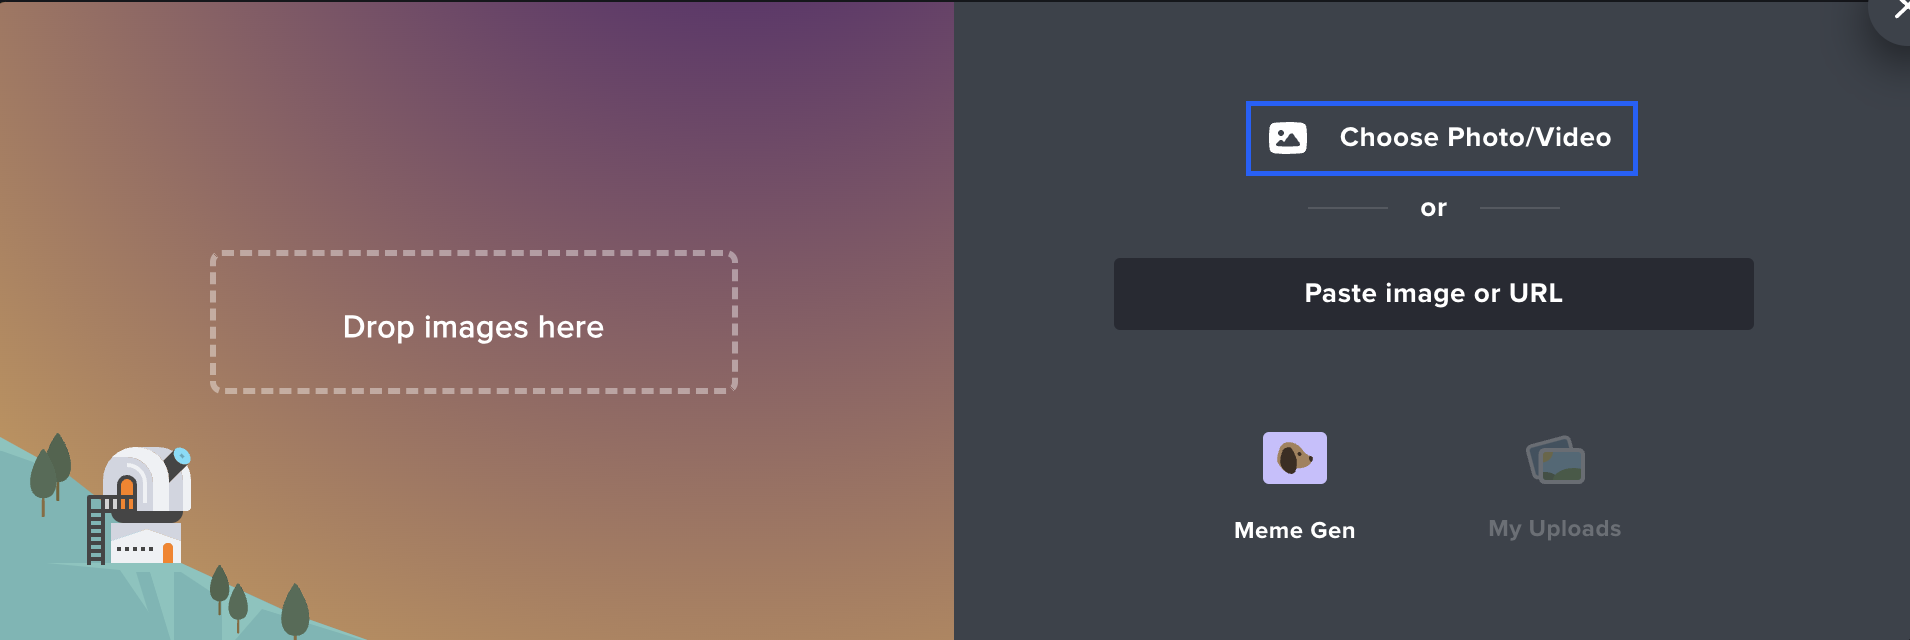
While on the site, click New post.
Here, press Choose Photo/Video and upload your pre-saved image:
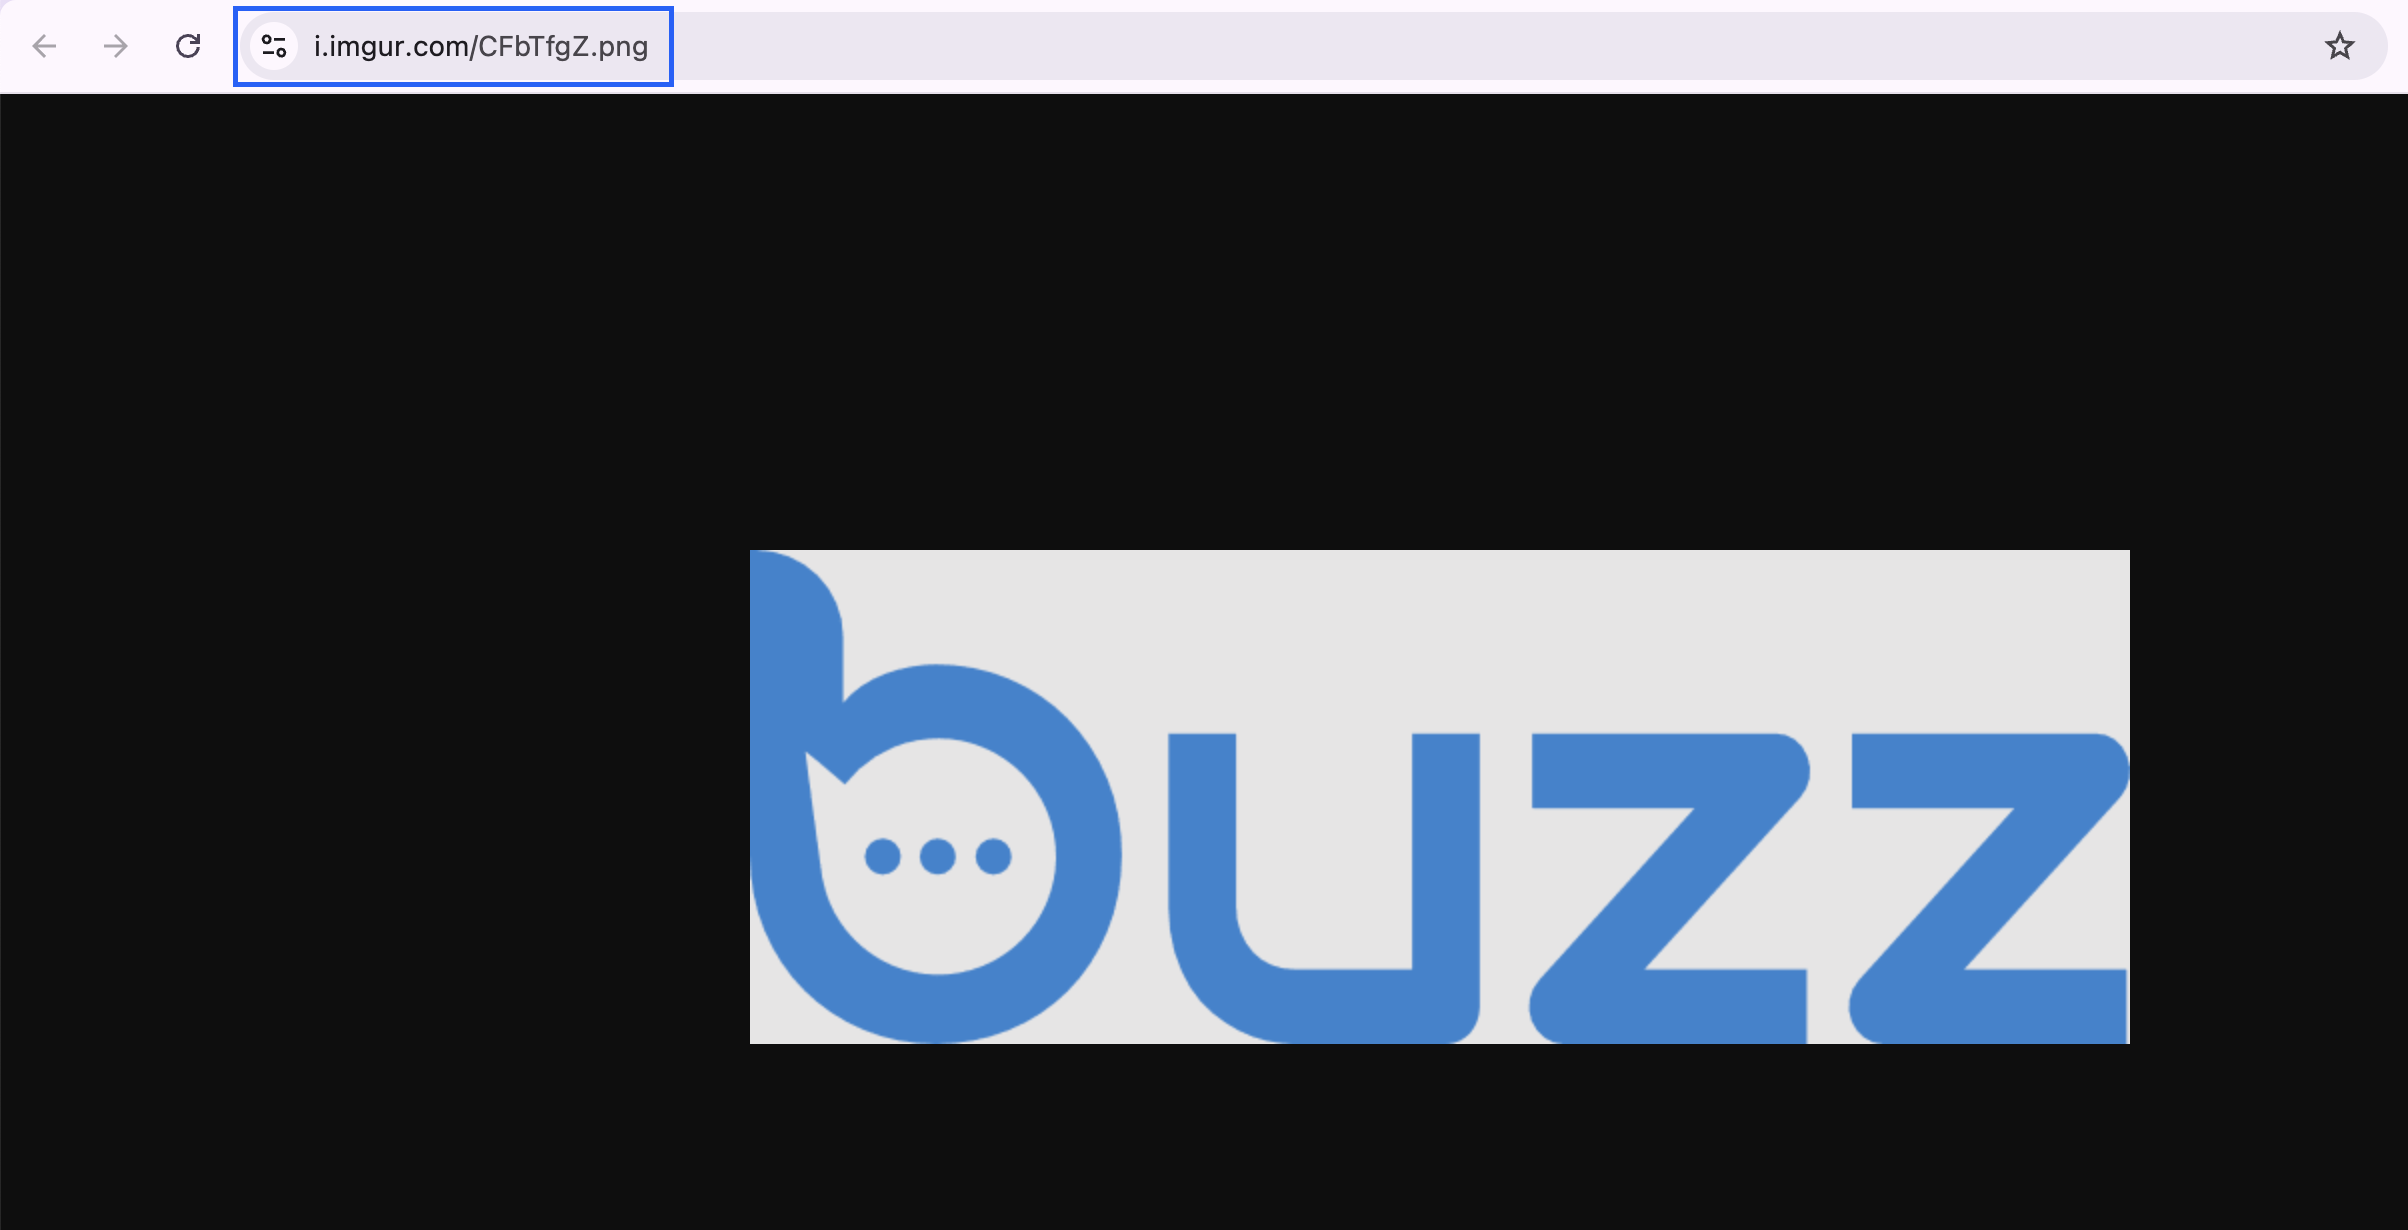
5. Once the upload is complete, right-click on the image and select Open image in new tab.
6. Copy the link displayed in the new tab:
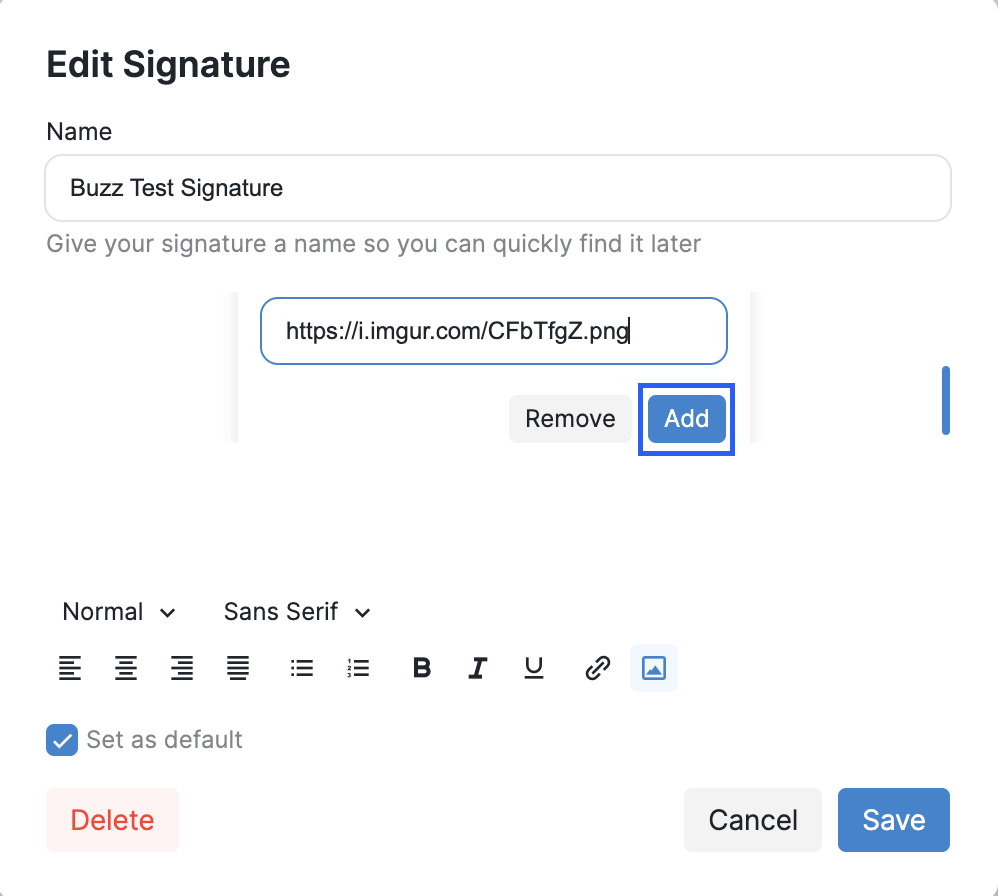
7. Return to the Buzz website, paste the newly-generated link, and click Add.
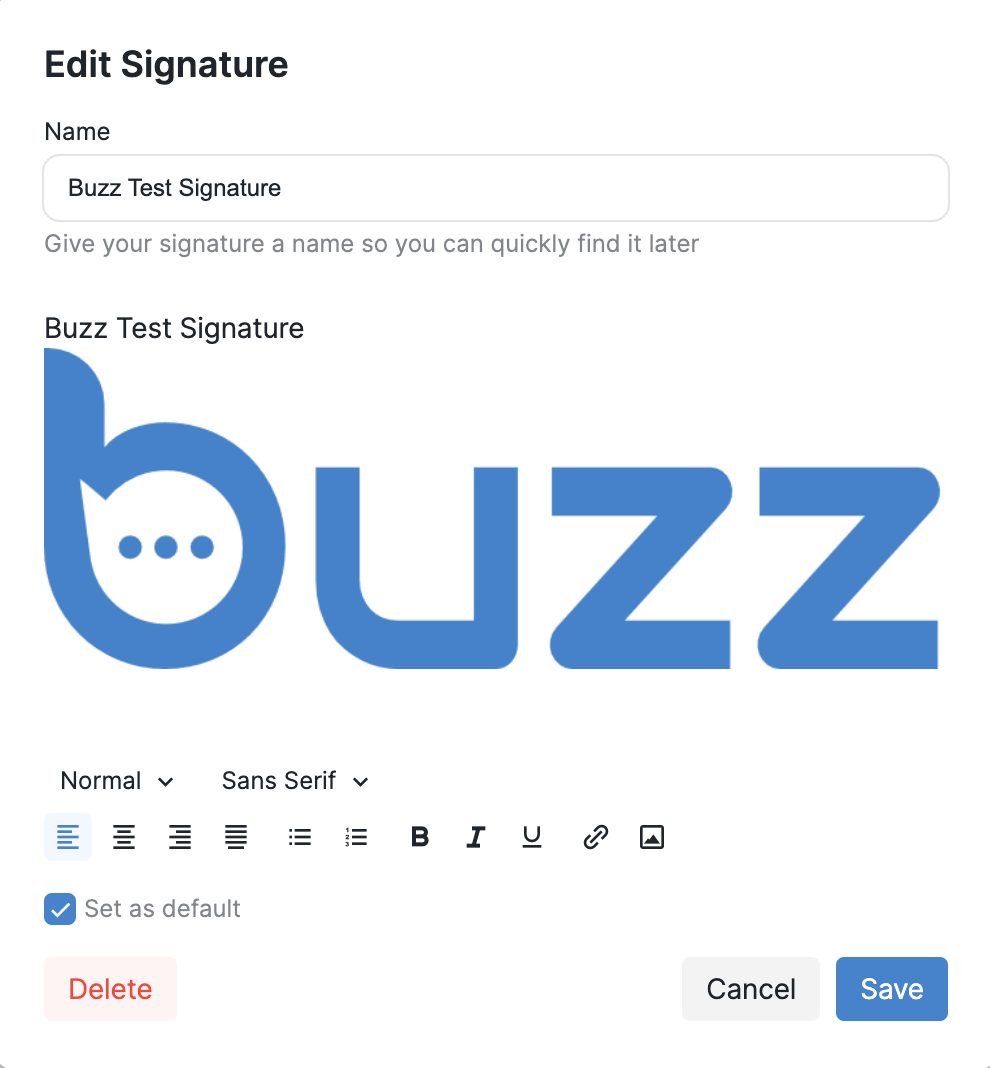
8. Your image has now been successfully embedded in the signature:
After saving, you will be able to utilize your signature during the Send Email step of your campaign. If you encounter any issues, please free to contact our Customer Support team for assistance.