How to Configure Webhooks in Buzz
Last updated: June 26, 2026
Webhooks provide an easy and efficient way to automate processes by allowing one service to send real-time data to another. By connecting a service using webhooks, you can automatically receive notifications or trigger specific actions when certain events occur. Whether you're looking to streamline workflows or enhance integrations, webhooks offer a powerful solution.
This guide will walk you through the steps to set up webhooks, ensuring seamless communication between our platform and other tools you use.
Webhook Settings
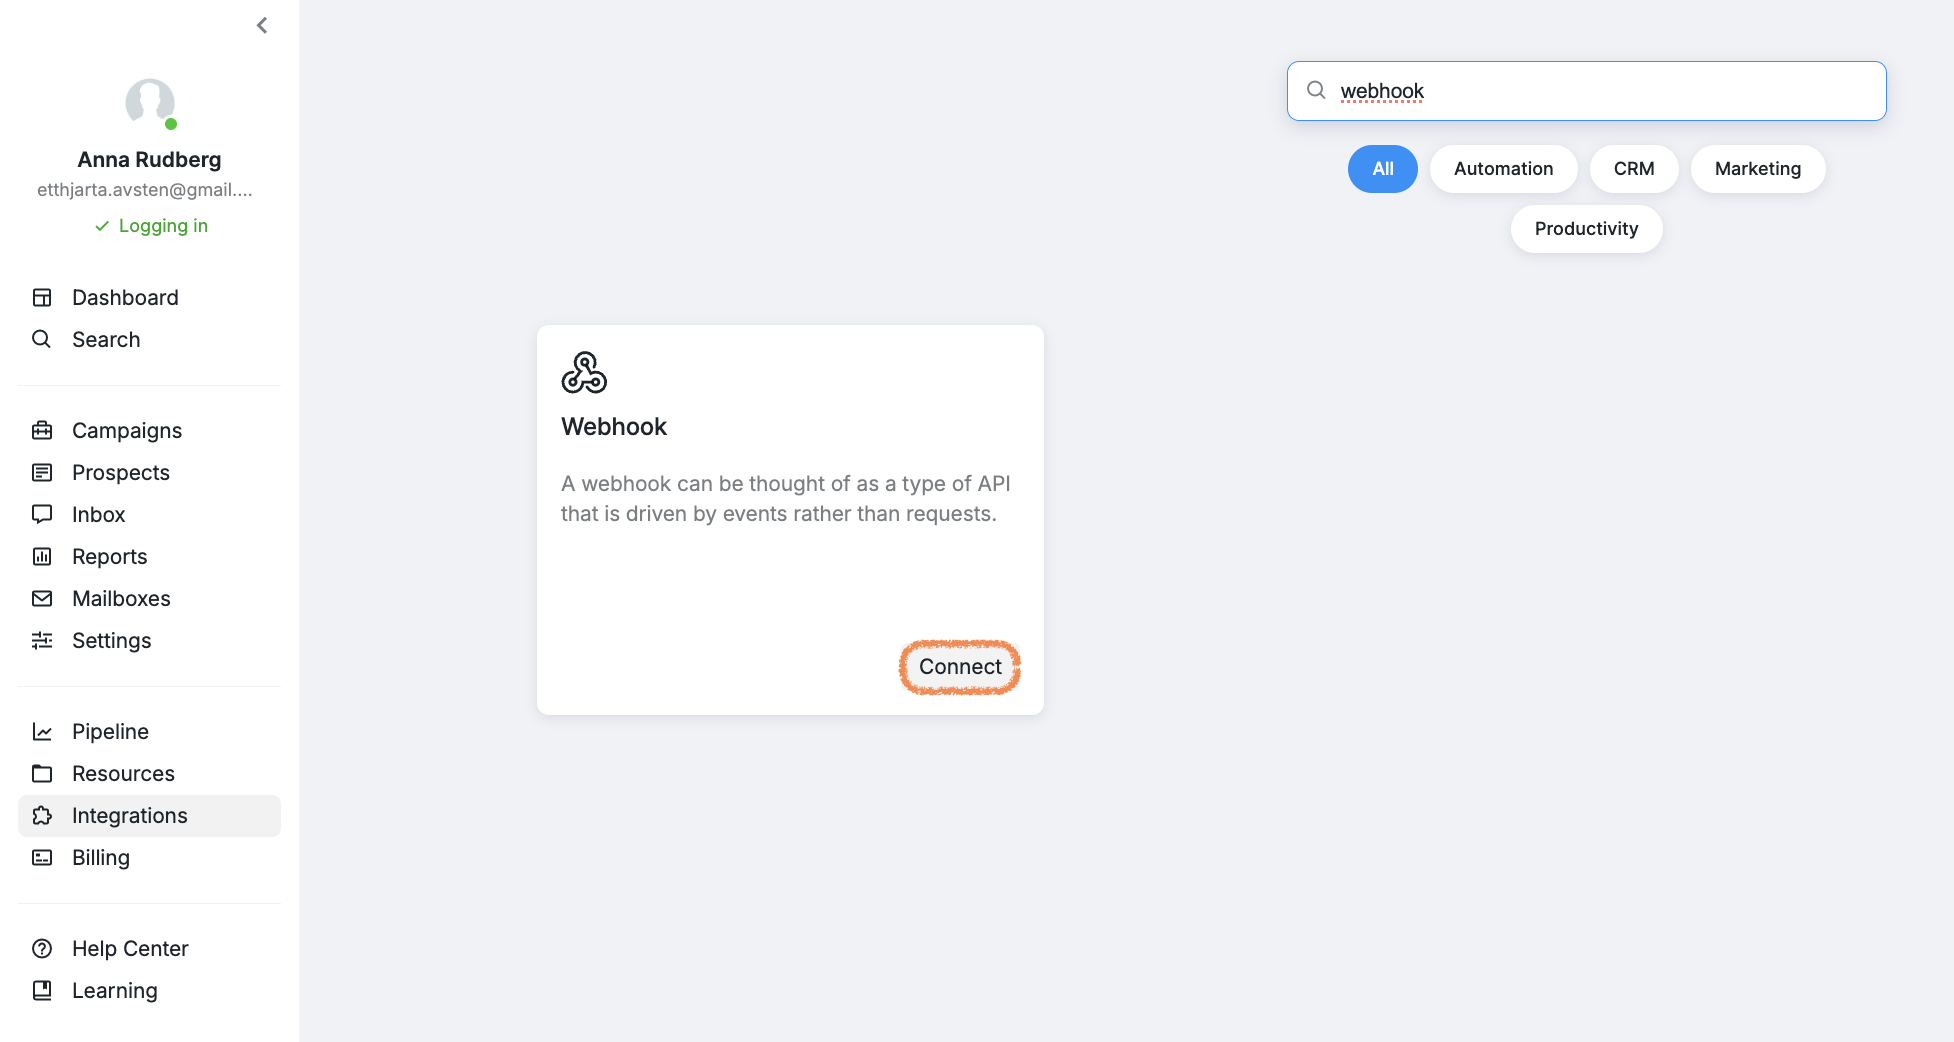
To access your Webhook settings, go to the Integrations tab, find the Webhook integration, and click Connect.
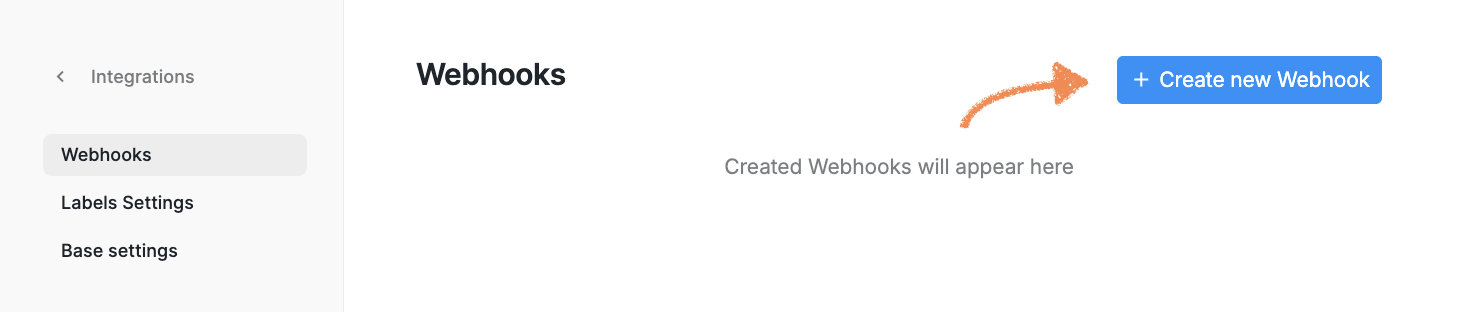
You will be directed to a page with three tabs: Webhooks, Label Settings, and Base Settings.
Setting Up a Webhook
To set up a webhook, navigate to: Integrations → Automation → Webhooks → Manage, then click Create New Webhook.
You will need to configure the following:
Callback URL: Enter the Callback URL provided by your system. This is the endpoint where we will send webhook requests.
What Type of Updates to Send: Select the event that should trigger the webhook. Once configured, click Create.
Label-Based Webhook Triggers
If you select When label added to prospect as the trigger event, one additional configuration step is required.
Navigate to: Integrations → Automation → Webhooks → Labels Settings
Enable the toggles for the labels that should trigger webhook requests when they're applied to prospects.
Note: If the corresponding labels are not enabled in this section, the webhook will not be triggered.

Configuring Data Sent in Webhooks
To configure the type of prospect data you would like to send as well as its formatting, navigate to: Integrations → Automation → Webhooks → Base Settings:
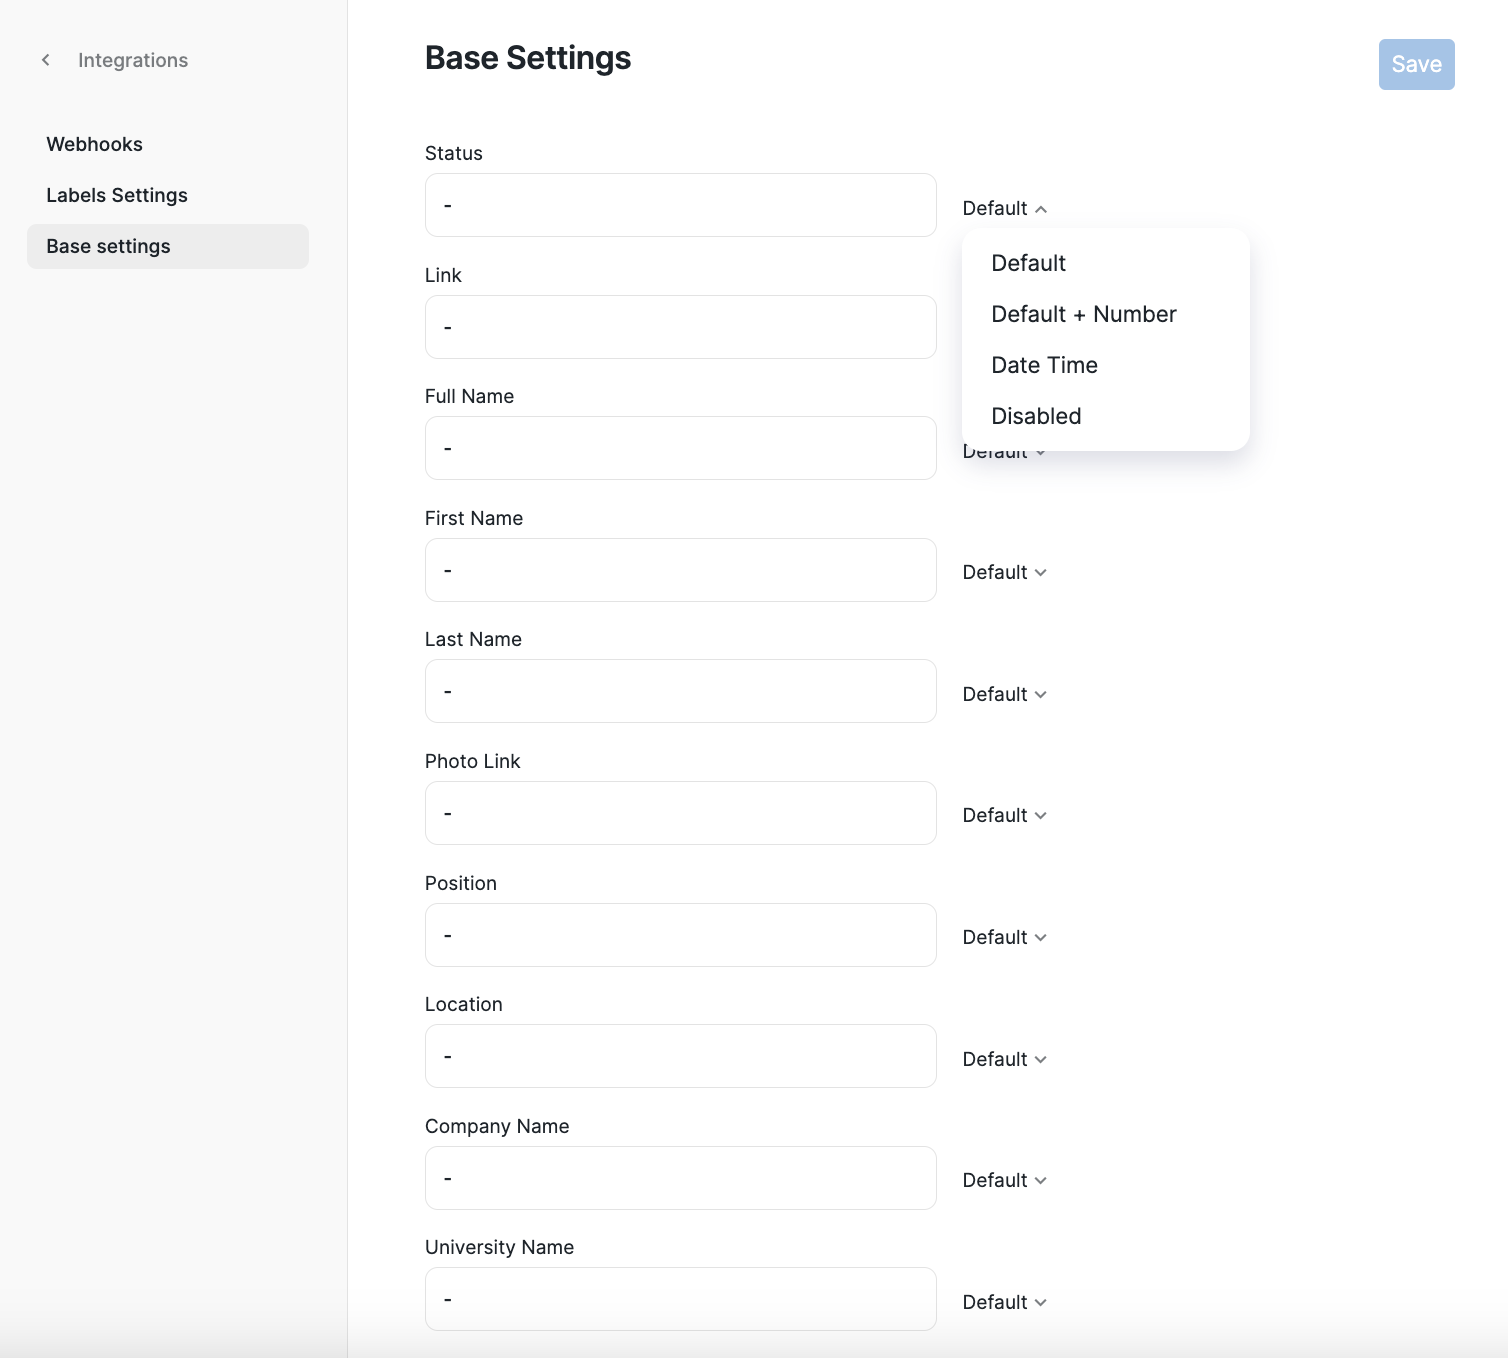
This section contains the fields that are included in webhook payloads by default.
For each field, you can choose the format:
Default: Only the relevant information will be displayed.
Default + Number: The relevant information with an item number.
Date Time: The date and time when the information was pulled.
Disabled: The field will not be included in the data export.
Ways to Send Data via Webhooks
There are two ways to send prospect data to your external system.
Option 1: Event-Based Webhooks
When a webhook is configured with a trigger event, it will fire every time that event occurs.
For example, if the webhook is configured to trigger when a label is added, a webhook request will be sent each time that action is performed.
If a prospect contains data for a configured field, that value will be sent.
If the prospect does not contain data for a field, the default value configured in Base Settings will be sent instead.
Each field can be customized according to your requirements.
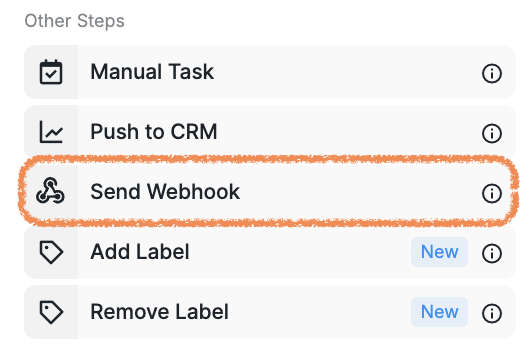
Option 2: Send Webhook Campaign Step
You can also use the Send Webhook step within a campaign.
In this scenario:
The webhook is triggered only when a prospect reaches that specific campaign step.
The webhook request is sent and the configured data is transferred.
No additional webhook requests will be sent unless the prospect reaches that step again.
This approach is useful when data should be sent at a specific stage of a campaign workflow.