Getting Started with Voicemail Drops and Your First Numbers
Last updated: May 11, 2026
Voicemail Drops is a Buzz feature that allows you to pre-record, store, and send ringless voicemails for seamless use in campaigns and inbox. This article will walk you through the process of recording custom voice messages and incorporating them into your campaigns.
Please note: Voicemail Drops are currently in beta and available only for recipients in the US and Canada.
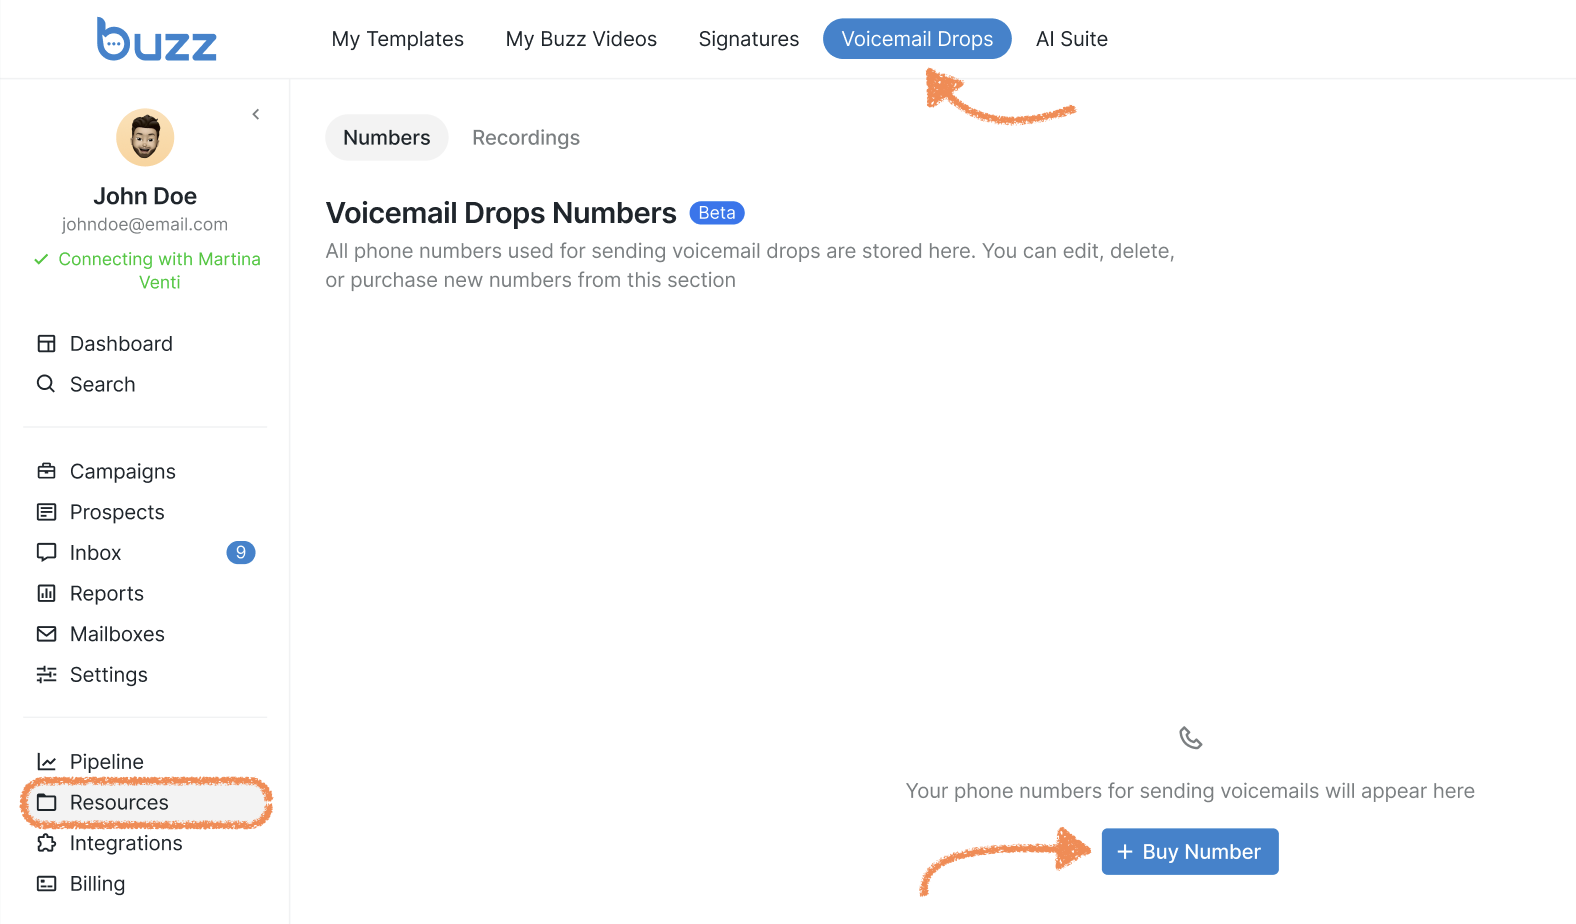
How to Purchase a Number for Voicemail Drops
Before you can begin sending Voicemail Drops, you’ll need to purchase a number. Start by going to the Resources tab, selecting Voicemail Drops from the top menu, and clicking Buy Number.
You’ll then be asked to configure a few details:
The country, state, and area of the number(s) you'd like to purchase
The quantity you’d like to purchase
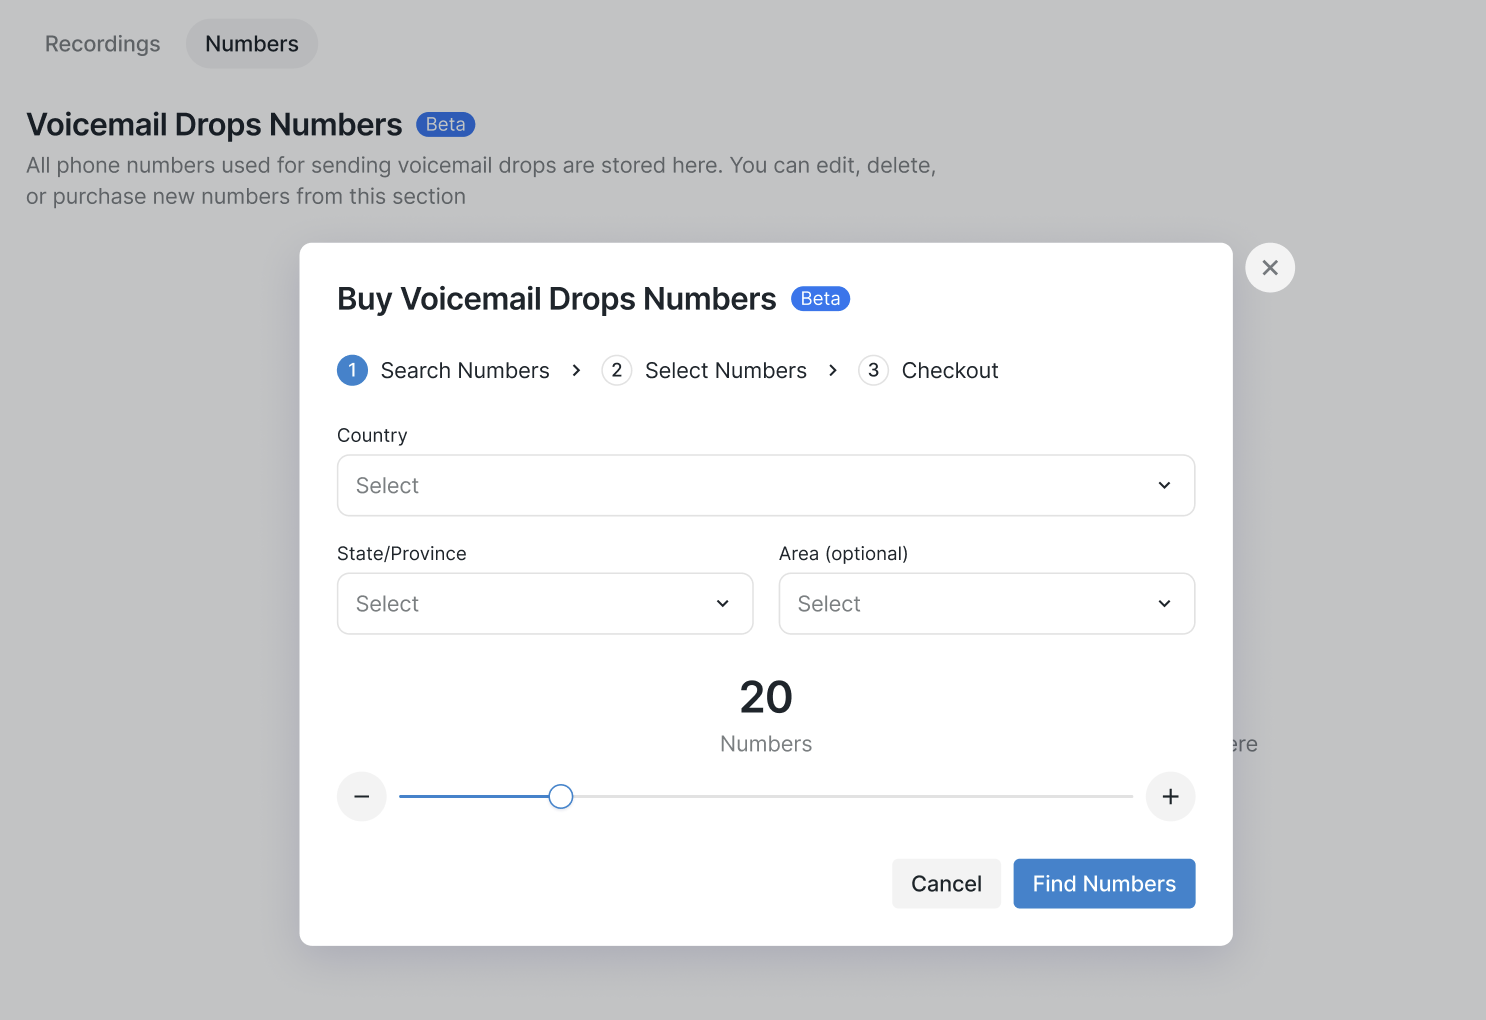
Good to know: You're free to purchase a number from any country, and it doesn't need to match your Dialer number (if you have one).
After the system runs a search, it will show you numbers that match your criteria. Select the ones you want and set a forwarding number — this is where prospects will reach you if they call back after receiving your voicemail.
The forwarding number is required: you must set one to proceed with sending Voicemail Drops.
The forwarding number applies to the entire batch of numbers, though you can edit it for each number later if needed.
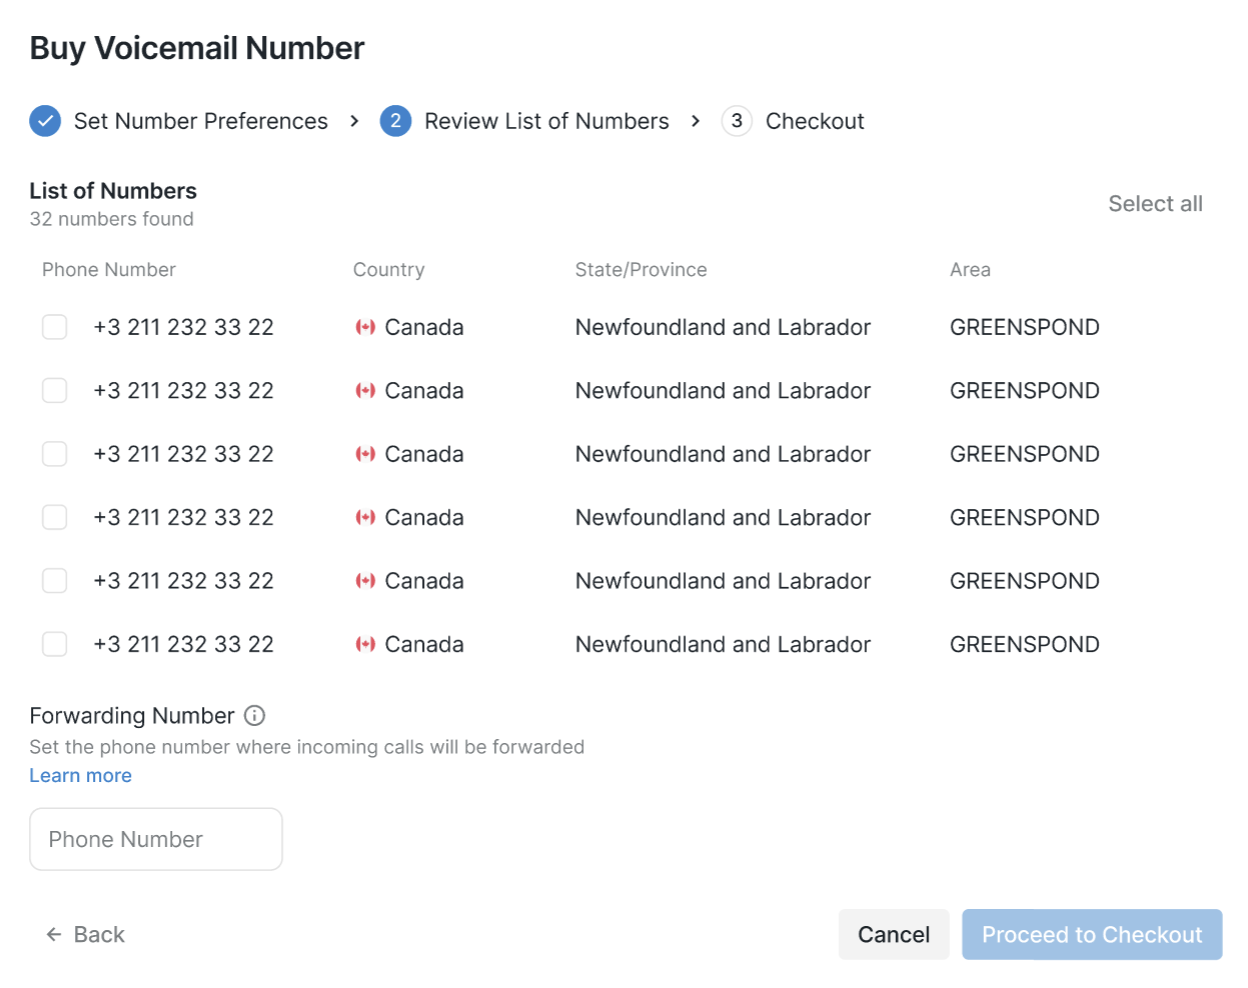
Note: Call forwarding works only for numbers within the NANPA region.
When everything looks right, click Proceed to Checkout, review your selections, and confirm by clicking Buy Numbers.
How to Edit Your Voicemail Number
After you have purchased your numbers, you can find them by going to Resources tab > Voicemail Drops > Numbers. Click on the three-dot button or anywhere on the row to edit or delete the number.
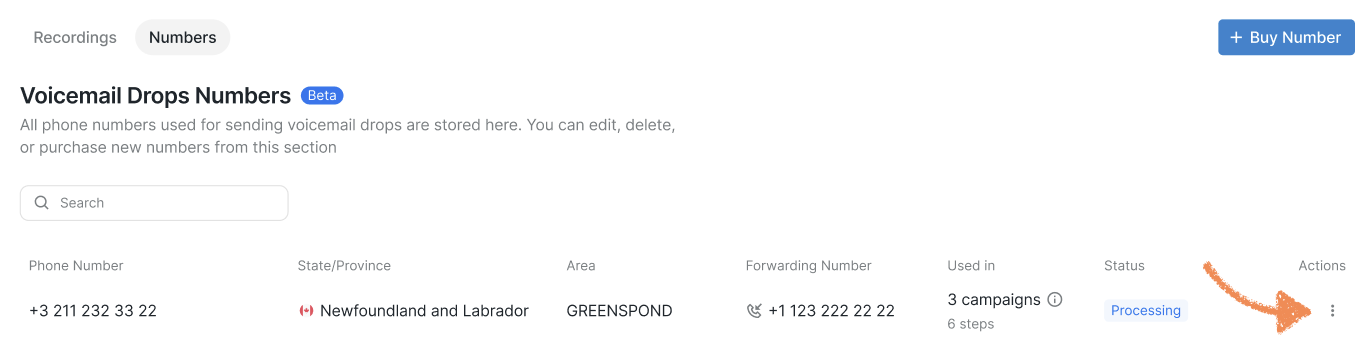
In the editing menu, you can assign a name to your numbers for easier identification in a list, as well as update the forwarding number for each one individually. You also have the option to delete a number altogether.
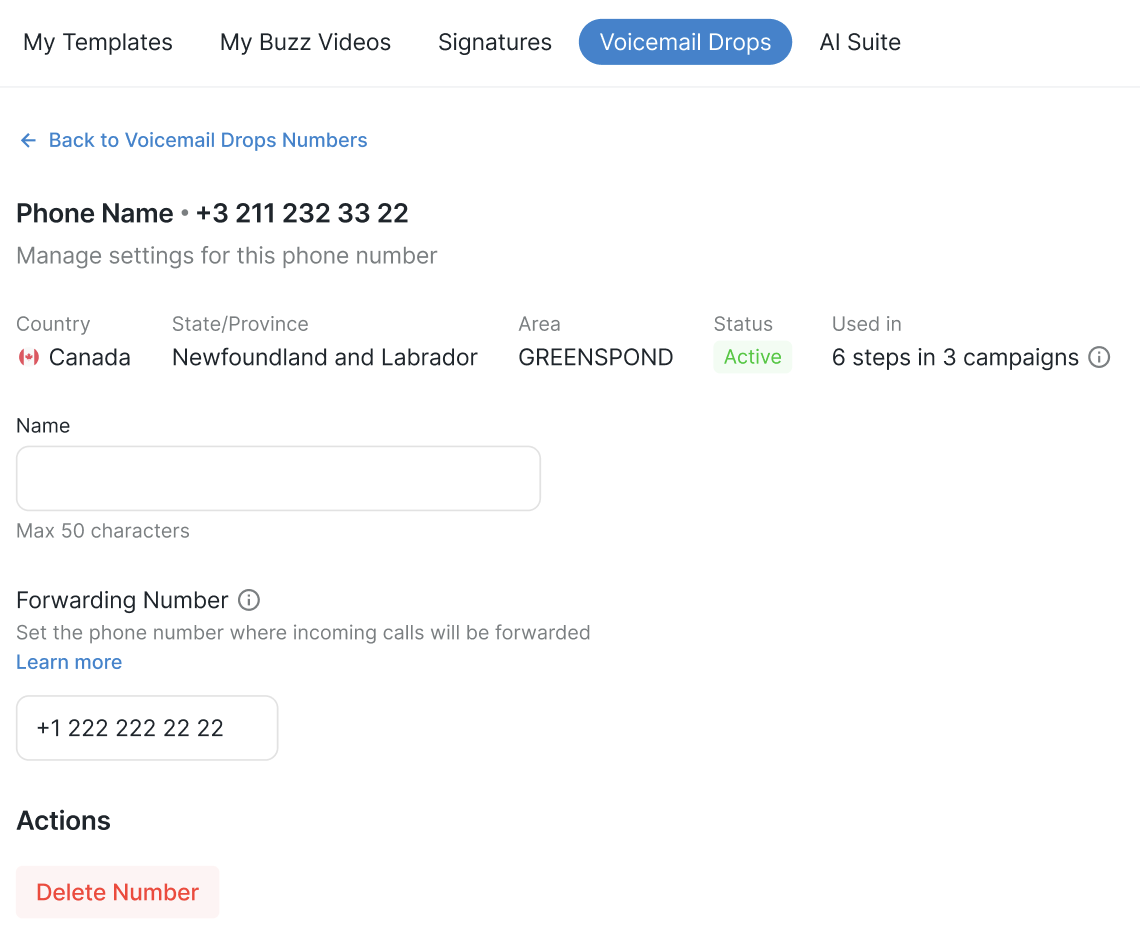
Please note: Deleted numbers are non-refundable, and no further calls or callbacks can be made through them.
You can also rename a number directly from the main screen by clicking the pencil icon next to it.
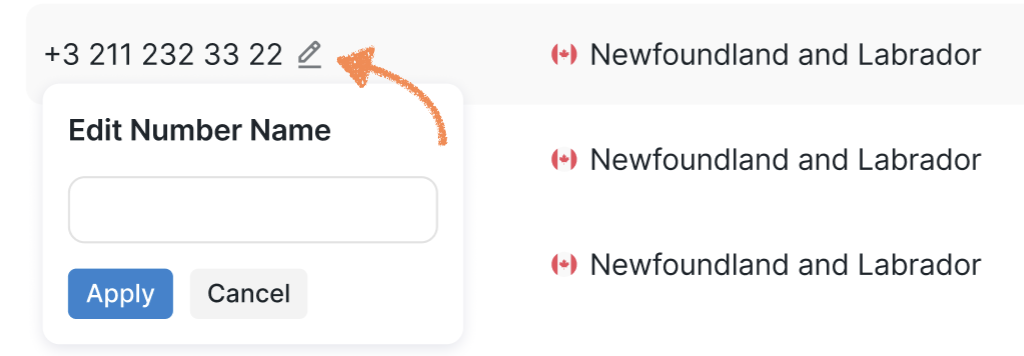
Similarly, clicking the pencil icon beside the assigned forwarding number on the main screen will allow you to update it immediately.
