How to Upload a CSV File to Your Campaign
Last updated: September 23, 2026
One of the search options available in Buzz is uploading a CSV file — perfect for when you already have a list of prospects and want to use Buzz to connect with them. Keep in mind that campaigns require at least one search source, such as a CSV file or search link, to generate activity and engage with prospects.
If you’ve exported a list from your preferred database (or created one from scratch), you can easily upload it and turn it into a campaign. Here's how to do it, step by step:
Before uploading your CSV file, configure the campaign settings that control how prospects are added. Enable "Add Prospects from Existing Campaigns" to include prospects already present in other campaigns, and enable "Recontact Prospects" if you want to contact prospects who have previously received messages or emails.
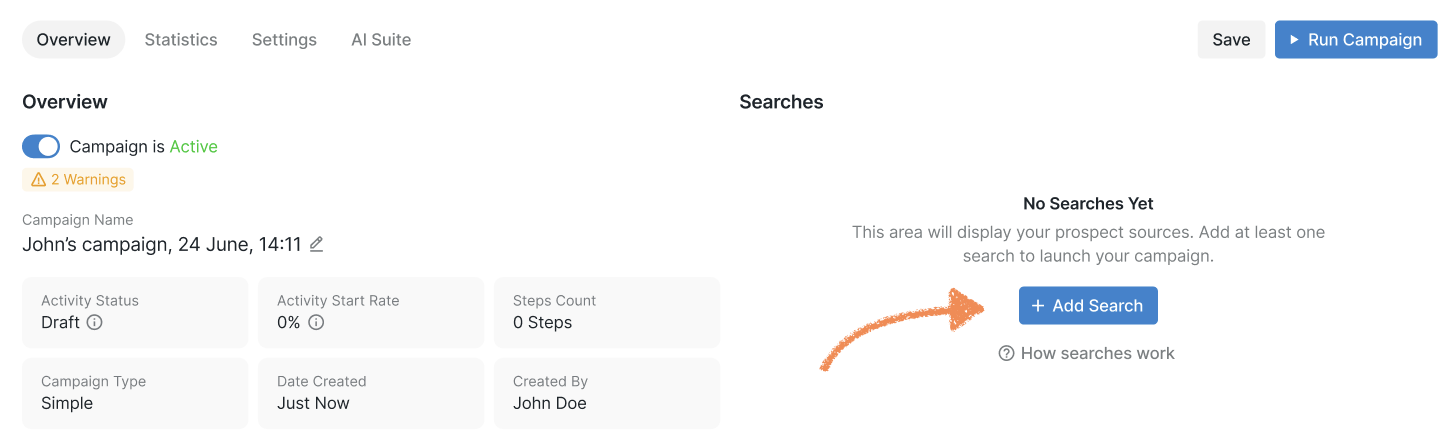
Start by creating your campaign. Once you're on the setup screen, click the Add Search button.
From the list of available search types, choose CSV File.
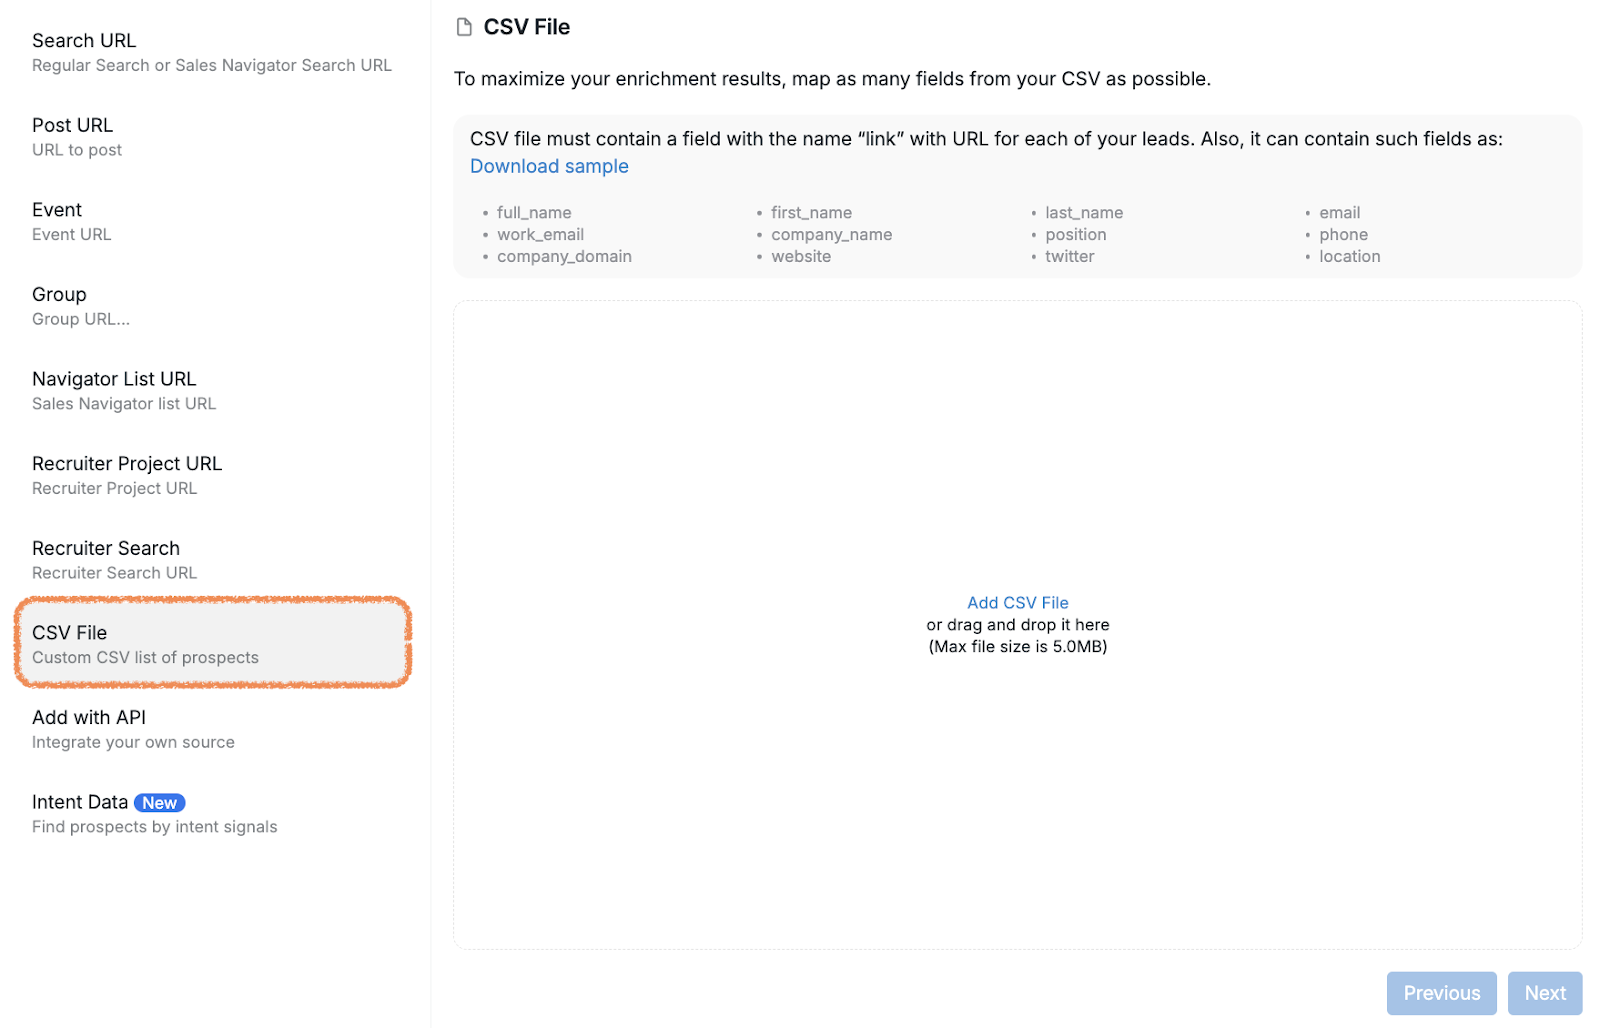
Then, click Add CSV File in the center of the screen.
Need a template? You can download an example file here: Sample CSV Template
If you don't have data for a particular column, leave the column blank instead of deleting it. Keeping all expected columns in place helps prevent field-mapping errors during upload.
Important: When uploading a CSV file, Buzz will reach out to all prospects in your list, even if they are already your LinkedIn connections. The system only excludes prospects if there is prior conversation history with them in Buzz. If you don't want to message existing connections, manually remove them from your CSV file before uploading.
After uploading your file, you’ll be prompted to map each field to match the campaign’s data requirements.
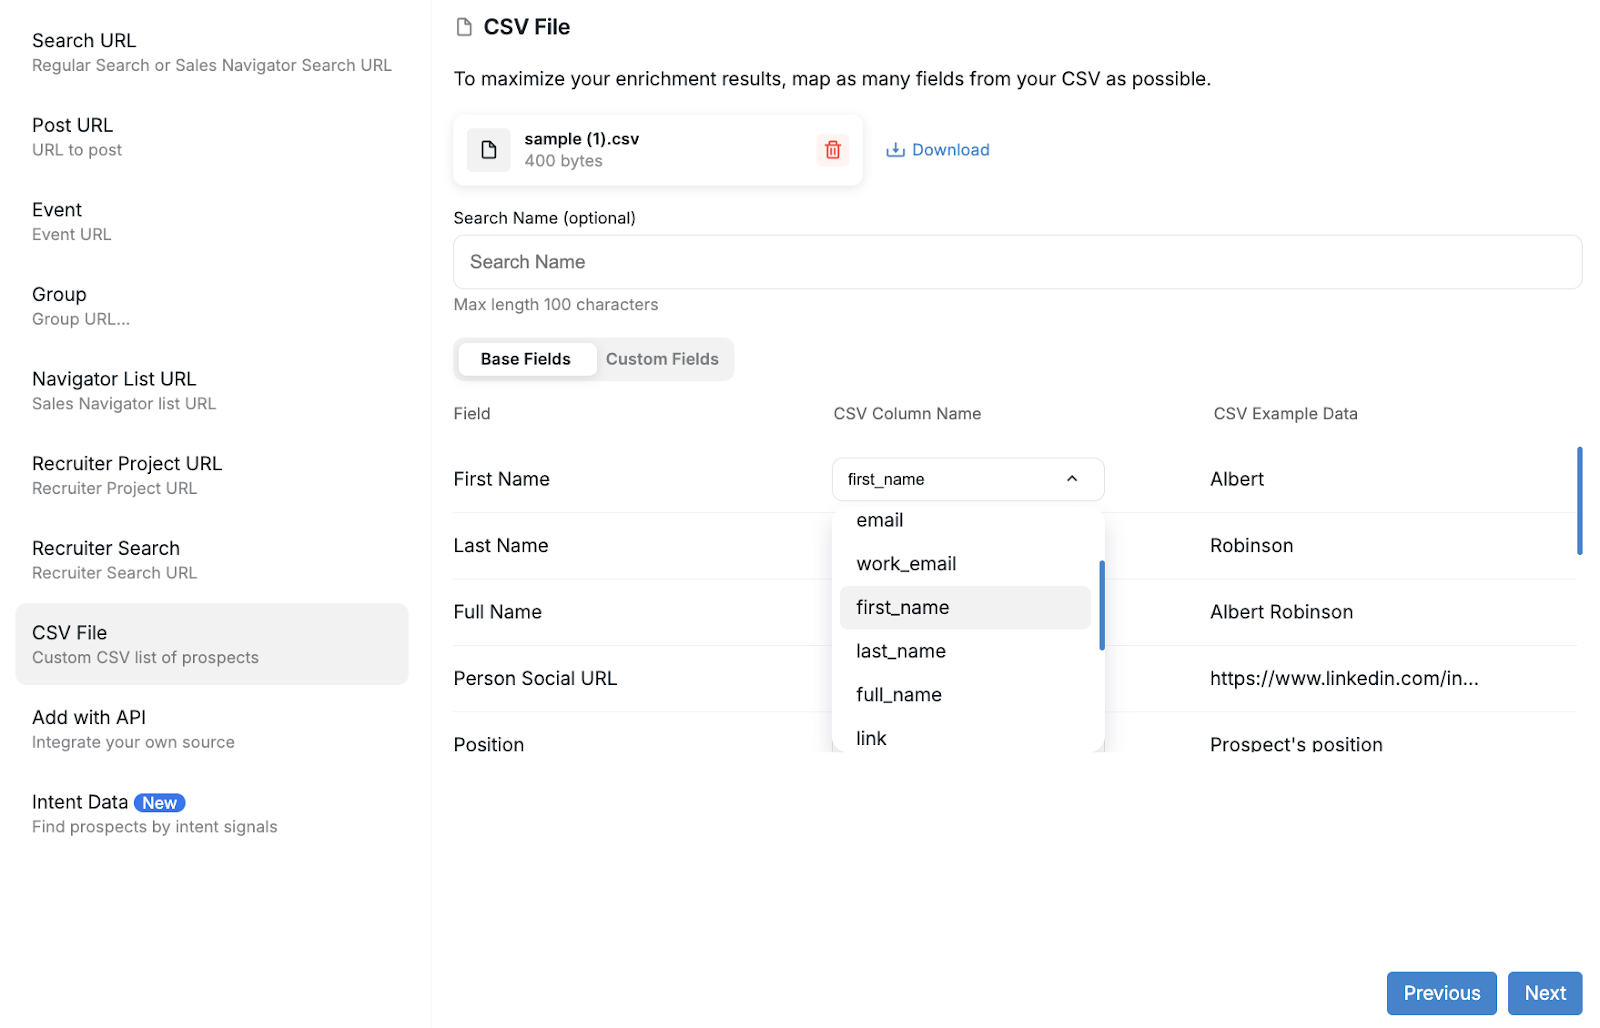
This step ensures the information in your file (like name, email, phone number, etc.) is accurately read by Buzz. Take your time with this — mapping your fields correctly is key to a smooth campaign launch.
Pay special attention when mapping the Work Email field, and make sure you select the correct email column from your CSV as the source. Incorrect field mapping is a common reason prospects may appear in Pending status instead of being added to your campaign.
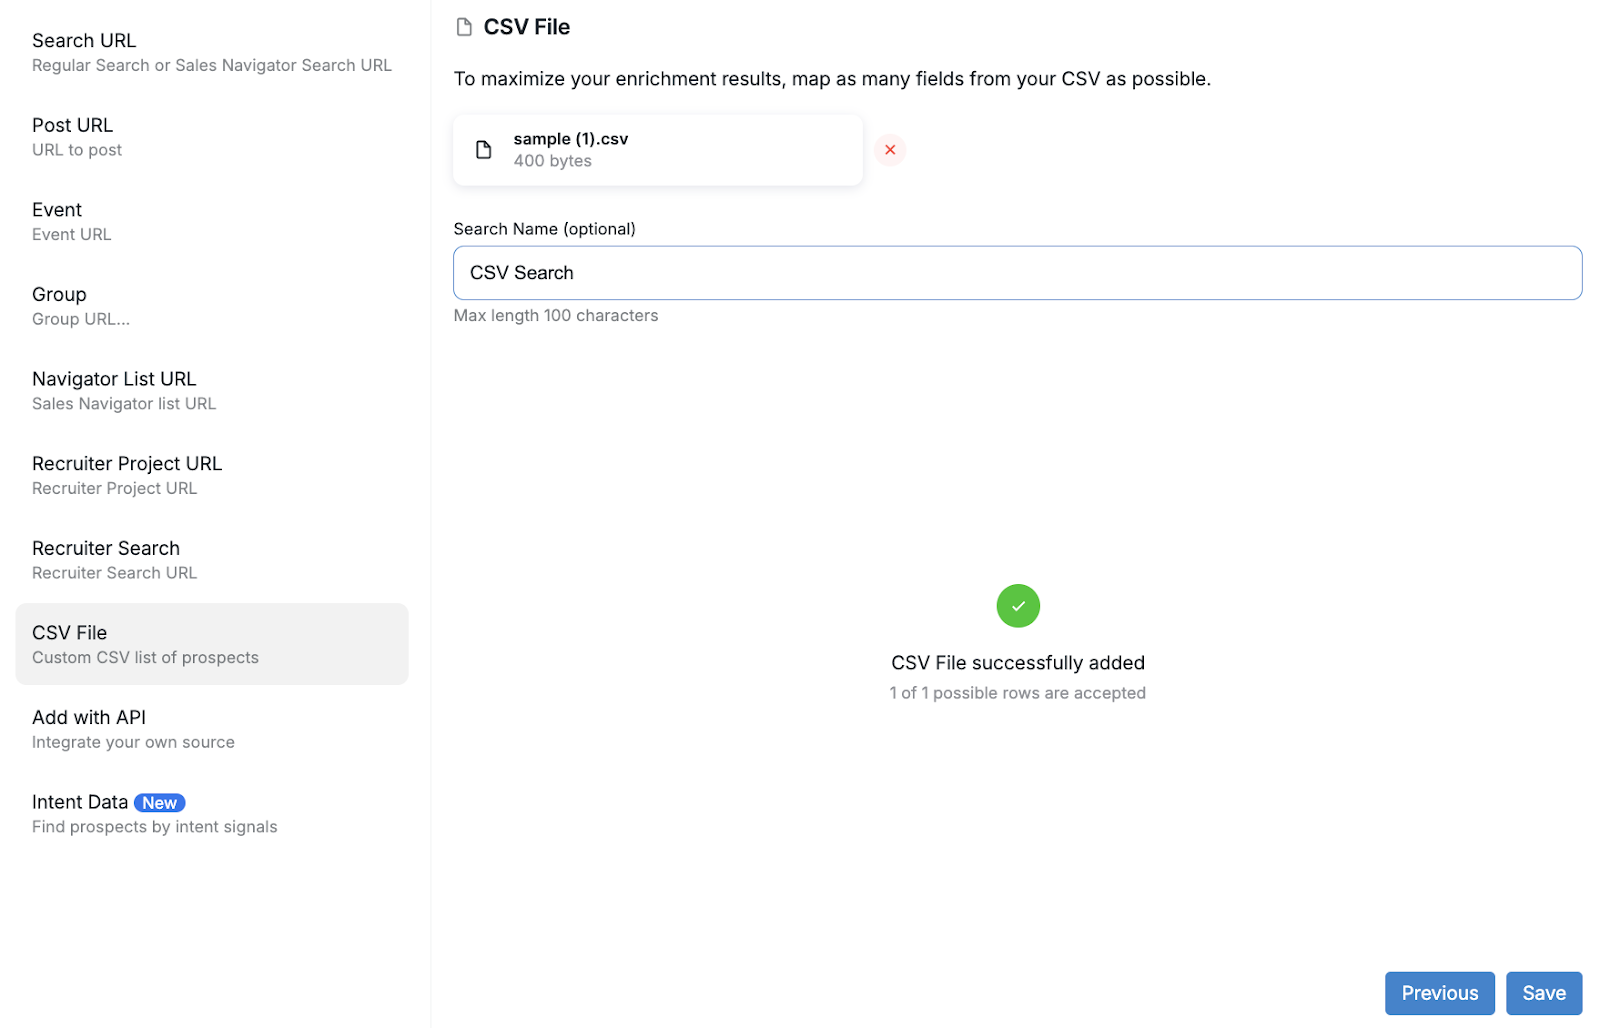
Once you’ve finished mapping and named your file, click Save to add the search to your campaign.
Important for Multichannel campaigns: Only prospects with LinkedIn links will be added to Multichannel campaigns. Prospects without LinkedIn links in your CSV will be rejected during validation. If you want to include all prospects with email addresses regardless of whether they have LinkedIn links, create an Email-only campaign instead.
Company names: For LinkedIn+Email campaigns, company names are fetched from LinkedIn and may overwrite the values in your CSV file. For Email-only campaigns, the company name data from your CSV is preserved.
Your prospects are now ready to be reached through Buzz!
Enriching Your Uploaded Prospects
If your CSV file includes LinkedIn URLs, you can enrich those prospects after they're loaded into the campaign. Both campaign-based and prospect view-based enrichment options will be available, allowing you to enrich records even when you only have a LinkedIn URL and not an email address.
A Quick Note on Troubleshooting
If your prospects aren’t showing up in the campaign as expected, check out this helpful article for the most common issues (all reasons except #8 apply to CSV uploads): Common Reasons That Prevent Prospects from Joining Your Campaign
Workspace deduplication: If prospects from your CSV aren't appearing in your campaign, check your workspace's deduplication settings. When "Deduplicate new profiles within workspace" is enabled, prospects who are already in another campaign within your workspace cannot be added to additional campaigns. This setting does not apply retroactively to prospects added before it was enabled.
If only a few or none of your uploaded prospects joined the campaign, check whether "Add Prospects from Existing Campaigns" was enabled before the upload. If you enabled it afterward, turn it on in the campaign settings and re-upload the CSV so the prospects can be added.
Re-upload your CSV file to the campaign.
Before saving, open Settings from the top menu.
Enable "Add Prospects from Existing Campaigns".
Save the campaign.
Open the Prospects tab, filter by your campaign name, select all prospects using the top-left checkbox, and choose Action → Resume campaign to ensure they are active.
This moves the prospects from their previous campaigns into your new campaign. The issue is especially common when campaigns use overlapping prospect lists or when you re-upload an updated version of the same database. Buzz prevents duplicate outreach by default, but you can enable this option when you intentionally want to move prospects between campaigns.
Prospects who were previously moved manually between campaigns are an exception: the "Add Prospects from Existing Campaigns" setting does not apply to them. To include these prospects in the new campaign, you must move them manually again.
If you have any questions or need help, our Customer Support team is always happy to help — reach out anytime!