
In this comprehensive guide, we will walk you through the step-by-step process of integrating SendGrid with Buzz.ai, enabling you to seamlessly manage and optimize your email communications. Let's dive in:
Integrating SendGrid will help you to increase your email daily outreach and land them directly to your prospect's inbox.Step 1: Create a SendGrid Account
If you don't have a SendGrid account yet, start by creating one. Visit the SendGrid website (https://sendgrid.com/) and sign up for an account. Follow the on-screen instructions to complete the registration process.
Step 2: Verify Your Domain
- Once your SendGrid account is set up, navigate to the SendGrid dashboard.
- In the "Settings" menu, select "Sender Authentication" and then choose "Domains."

- Click on the "Authenticate Your Domain" button.
- Choose your Domain provider and mark the step 2 as Yes then next
- You will need to enter your sender Domain name (The one you will use to send emails from) then Next.


- Follow the provided instructions to add and set the required DNS records to your domain provider. Once added mark (I've already added the records then Verify button in SendGrid to complete the domain verification process.


Step 3: Verify Your Sender (Email Address)
- In the SendGrid dashboard, go to "Settings" and select "Sender Authentication," then click on "Single Sender Verification."
- Enter the email address from which you intend to send emails through Buzz.ai.

- SendGrid will send a verification email to the specified address; follow the instructions in the email to complete the verification process.
- In the SendGrid dashboard, go to "Settings" and select "Sender Authentication," then click on "Single Sender Verification."
Step 4: Obtain SendGrid API Key
Once your SendGrid account is set up- navigate to the SendGrid dashboard. Locate the "Settings" menu on the left section, and select "API Keys."

- Generate a new API key: Give it any name or label ex. Main API
API Key Permission has to be Full Access.
Step 5: Access Buzz.ai Settings
Log in to your Buzz.ai account and navigate to the settings section. Look for the "Integrations" or "Email Settings" option, depending on your Buzz.ai version.
Step 6: Choose Email Integration
Within Buzz.ai settings, find the section related to email integrations. Select "SendGrid" from the available options.
Where to find SendGrid access token?
This is a unique token that SendGrid shows one time for one key. It is impossible to view the token more than once.
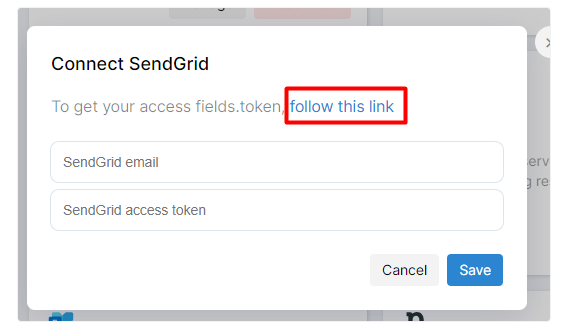
- Click follow this link in Connect SendGrid windowOnce API Key is created, we need to copy it now and set it in Buzz account.
- You will be directed to API keys window in SendGrid
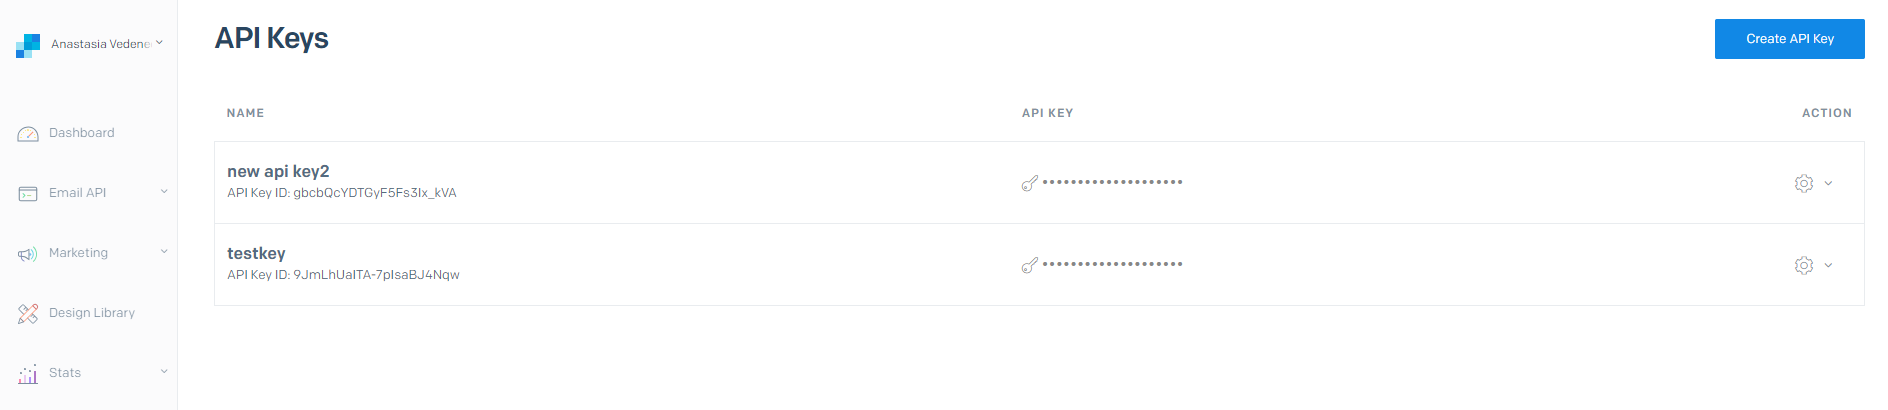
- If you already have the keys, then you will not be able to see the token, since it was shown to you when creating the key. You will need to create a new key by clicking Create API KEY at the top right corner.

- Fill out the details under the permissions and click Create & View
-
A window will appear informing you of successfully creating an API key. Do not close the window before saving the token. You will not be able to view this token again, once you close the window.
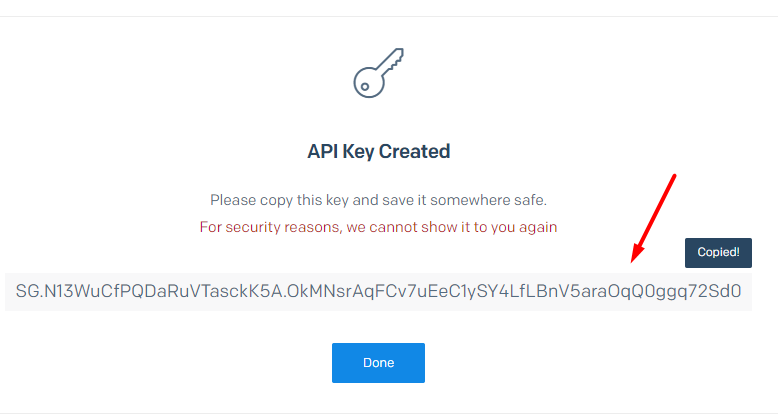
- Copy this token and paste it in SendGrid access token. Click Save
-
If you entered the data correctly, the next window will appear SMTP connectionNote: If you have SMPT connected to google, then you will be take SMTP data from there. The delivery will still be executed through Sendgrid.

The first two fields contain your Sendgrid login information.SMTP:- SMTP Server - https://smtp.sendgrid.net
- Port 465 (Placed automatically when choosing the type below)
- SSL
IMAP:Note: The information entered here is the date from the provider of the mailbox used by the client. Different mail providers have different date. The most common ones are listed below:Gmail/Google Workspace:Host IMAP: imap.gmail.comPort: 993Outlook/Office 365:Host IMAP: imap-mail.outlook.comPort: 993For any other type of IMAP/inbox you will need to acquire this information from your email provider.Example:- IMAP Server - imap.gmail.com or imap.google.com
- Port 993 (Placed automatically when choosing the type below)
- SSL
8. Click Save.Note: If you receive an error message like the one below: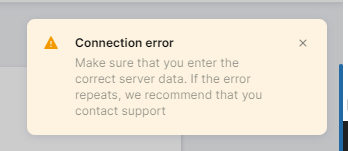
It is likely due to having a two-factor authentication for your SendGrid account which protects basic authentication.How to turn it off?Go to your Settings in SendGrid and choose Two-Factor authentication Delete the chosen method of authentication ( the app or SMS) by clicking the icon on the right.
Happy Buzzing!