
Welcome to Buzz! You’ll now want to begin your marketing campaigns, no doubt, so here’s how you do it.
With Buzz, you can automate your marketing campaigns to optimize your outreach. Improving your sales - and thus your revenue - is made easier with our sophisticated tracking and targeting systems.
Before you begin your marketing campaigns, you’ll first want to consider a bit of preparation. When you’ve planned ahead, you’ll find creating your campaigns with Buzz to be a walk in the park.
How to plan your campaign
1. First things first, it’s important to plan what kind of campaign you want to run. You must make a decision on what copy you should use, whether that’s emails or short direct messages, to ensure maximum effectiveness of your campaign.
2. Next, it’s a good idea to decide on an ideal customer profile (ICP). This will ensure you target the right potential customers, and will help you formulate what the overall message will be in your copy. Most of all, knowing your ICP will ensure you receive the best possible response rate.
3. Lastly, find any posts or events that you want to target. You can include the links to these in your campaign, and Buzz will automatically target everyone who’s engaged with the chosen event or post.
Creating your campaign
Once you’ve planned out your campaign you’ll want to head to your home dashboard by typing dash.buzz.ai into your search engine and logging in with your Buzz credentials. Follow these next steps to create a successful campaign with Buzz:
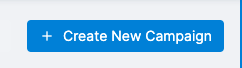
1. In the top right-hand corner, click on the big blue “+Create New Campaign” button.
2. You will be asked to choose either a "simple" campaign or a "smart campaign"
3. Once you have selected your sequence type, you can name your campaign, insert any links to posts or events you want to target, and select the sequence for your outreach. You can also insert any search URLs you want from the LinkedIn Sales Navigator, but you don’t need this to use Buzz.
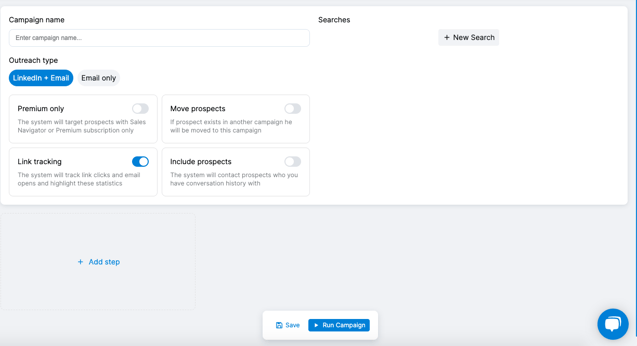
4. Next, click on the blue “+Add Step” button after selecting your sequence. This will present you with a number of different actions you can add to create your campaign.
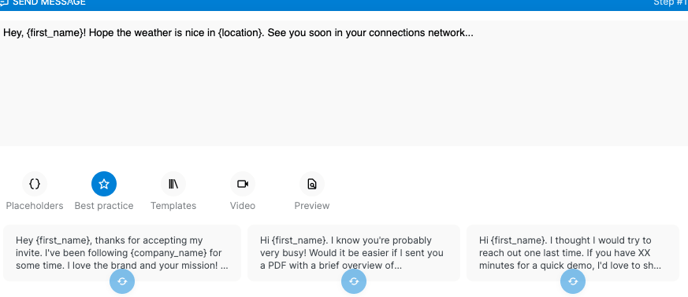
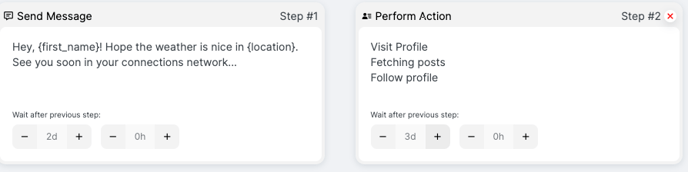
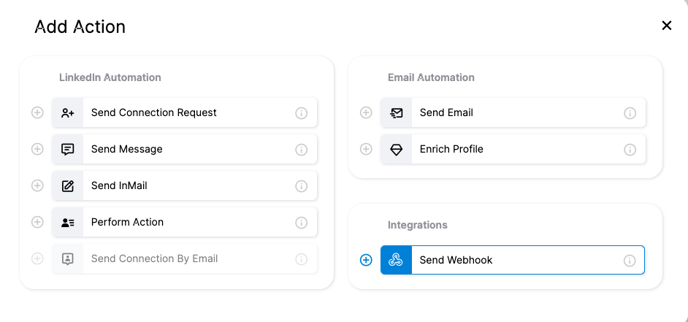 5. Select your actions as you desire. For a LinkedIn campaign, we recommend using “Send connection request” and “Send message”. For each action, add the copy of your choice.
We also have best practices templates available in the send message tab
6. Adjust the delays on your actions - you don’t want them all to happen at once! Use the timer buttons on the action widget once you’ve added it to adjust the delays.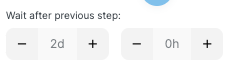
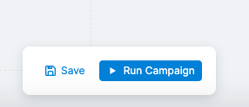 8. After it’s all looking good, it’s time to hit the “Run Campaign” button at the bottom of the screen. Or, if you’re not quite finished, you can save your campaign as a draft to access again later.